Cassette paper guide position change procedure
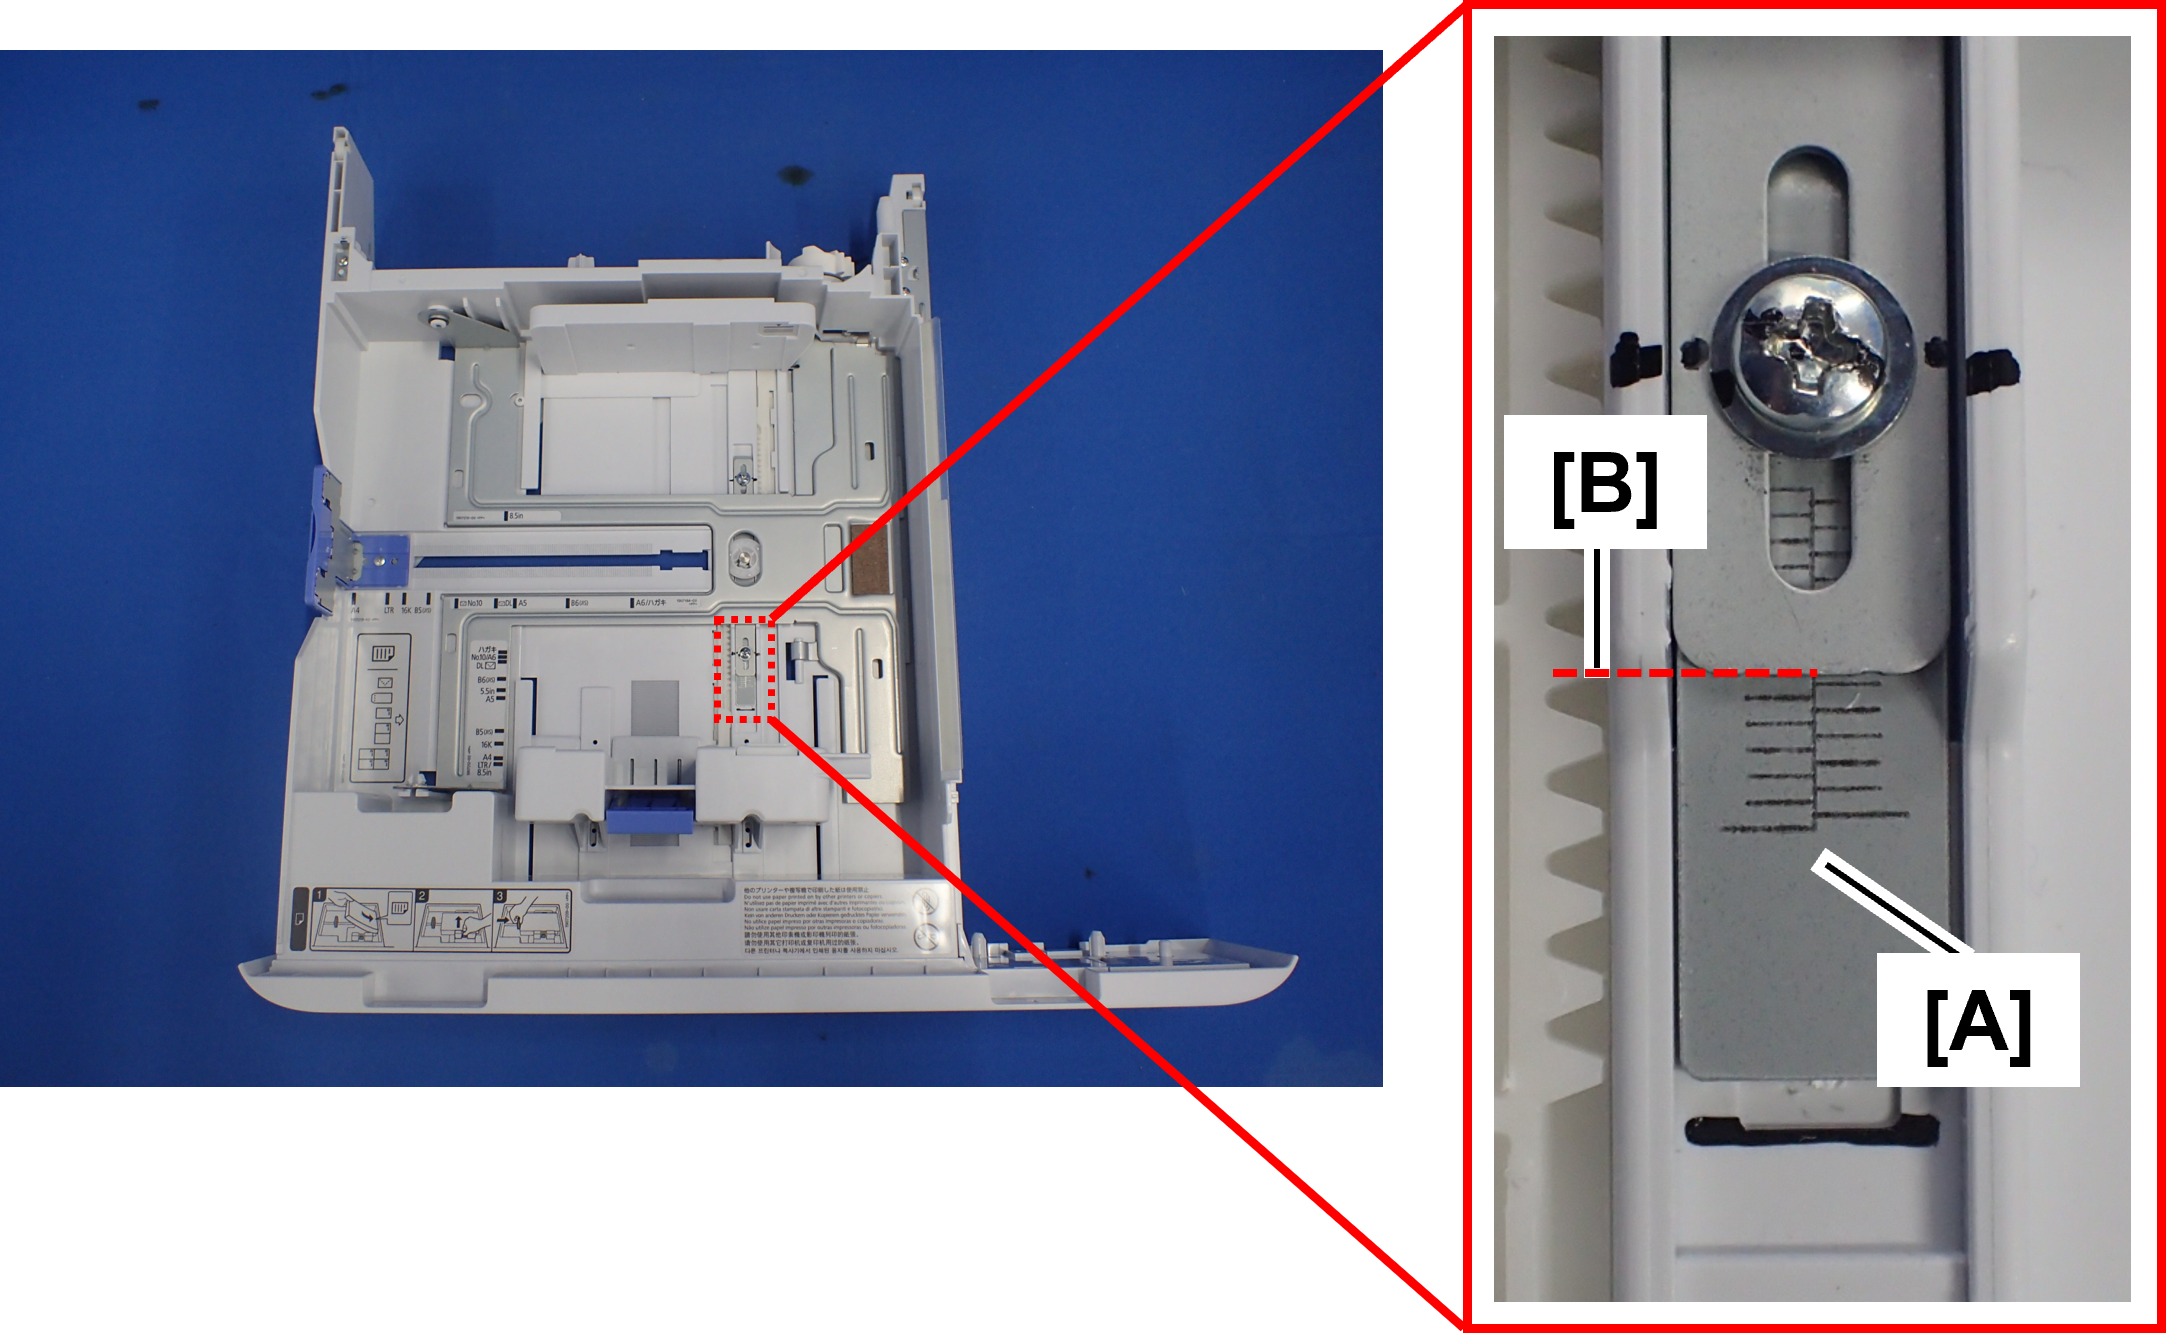
Remove the cassette (A) to be adjusted.

Record the current position of the main notch edge (B) for the scale block (A).
 Check Point / チェックポイント
- Paper guide position change is based on the calculated state of the margin difference.
It is recommended to memorize in order to prevent rework when the changed by mistake position of the adjustment plate in the next steps.
- Paper guide position change is based on the calculated state of the margin difference.
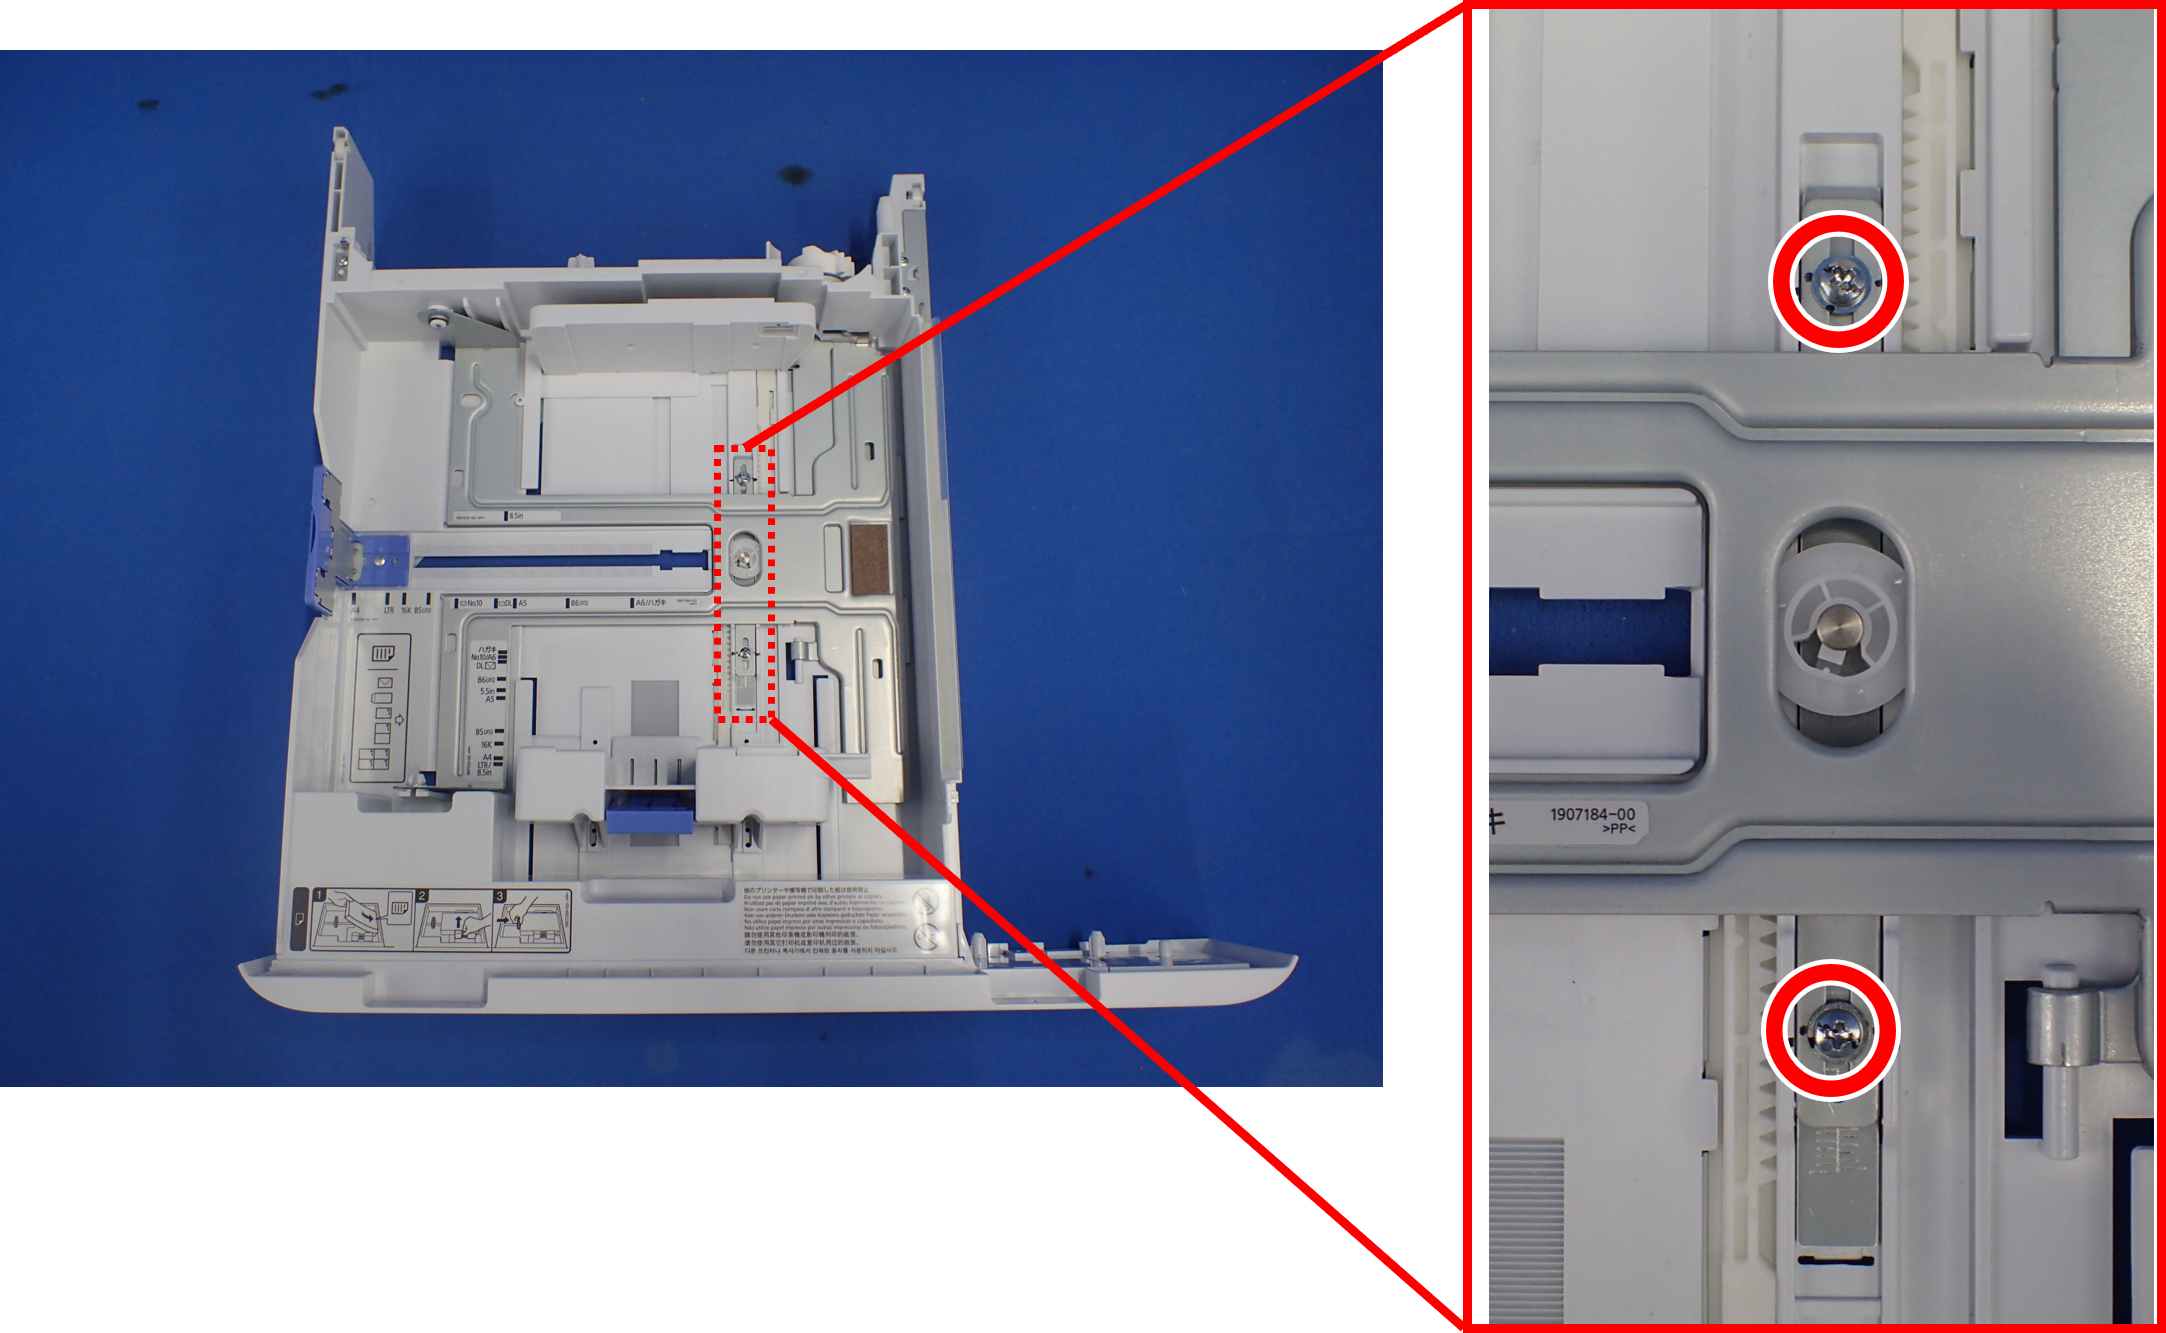
Loosen the 2 fixing screws on the adjustment plate (about 1.5 turns).
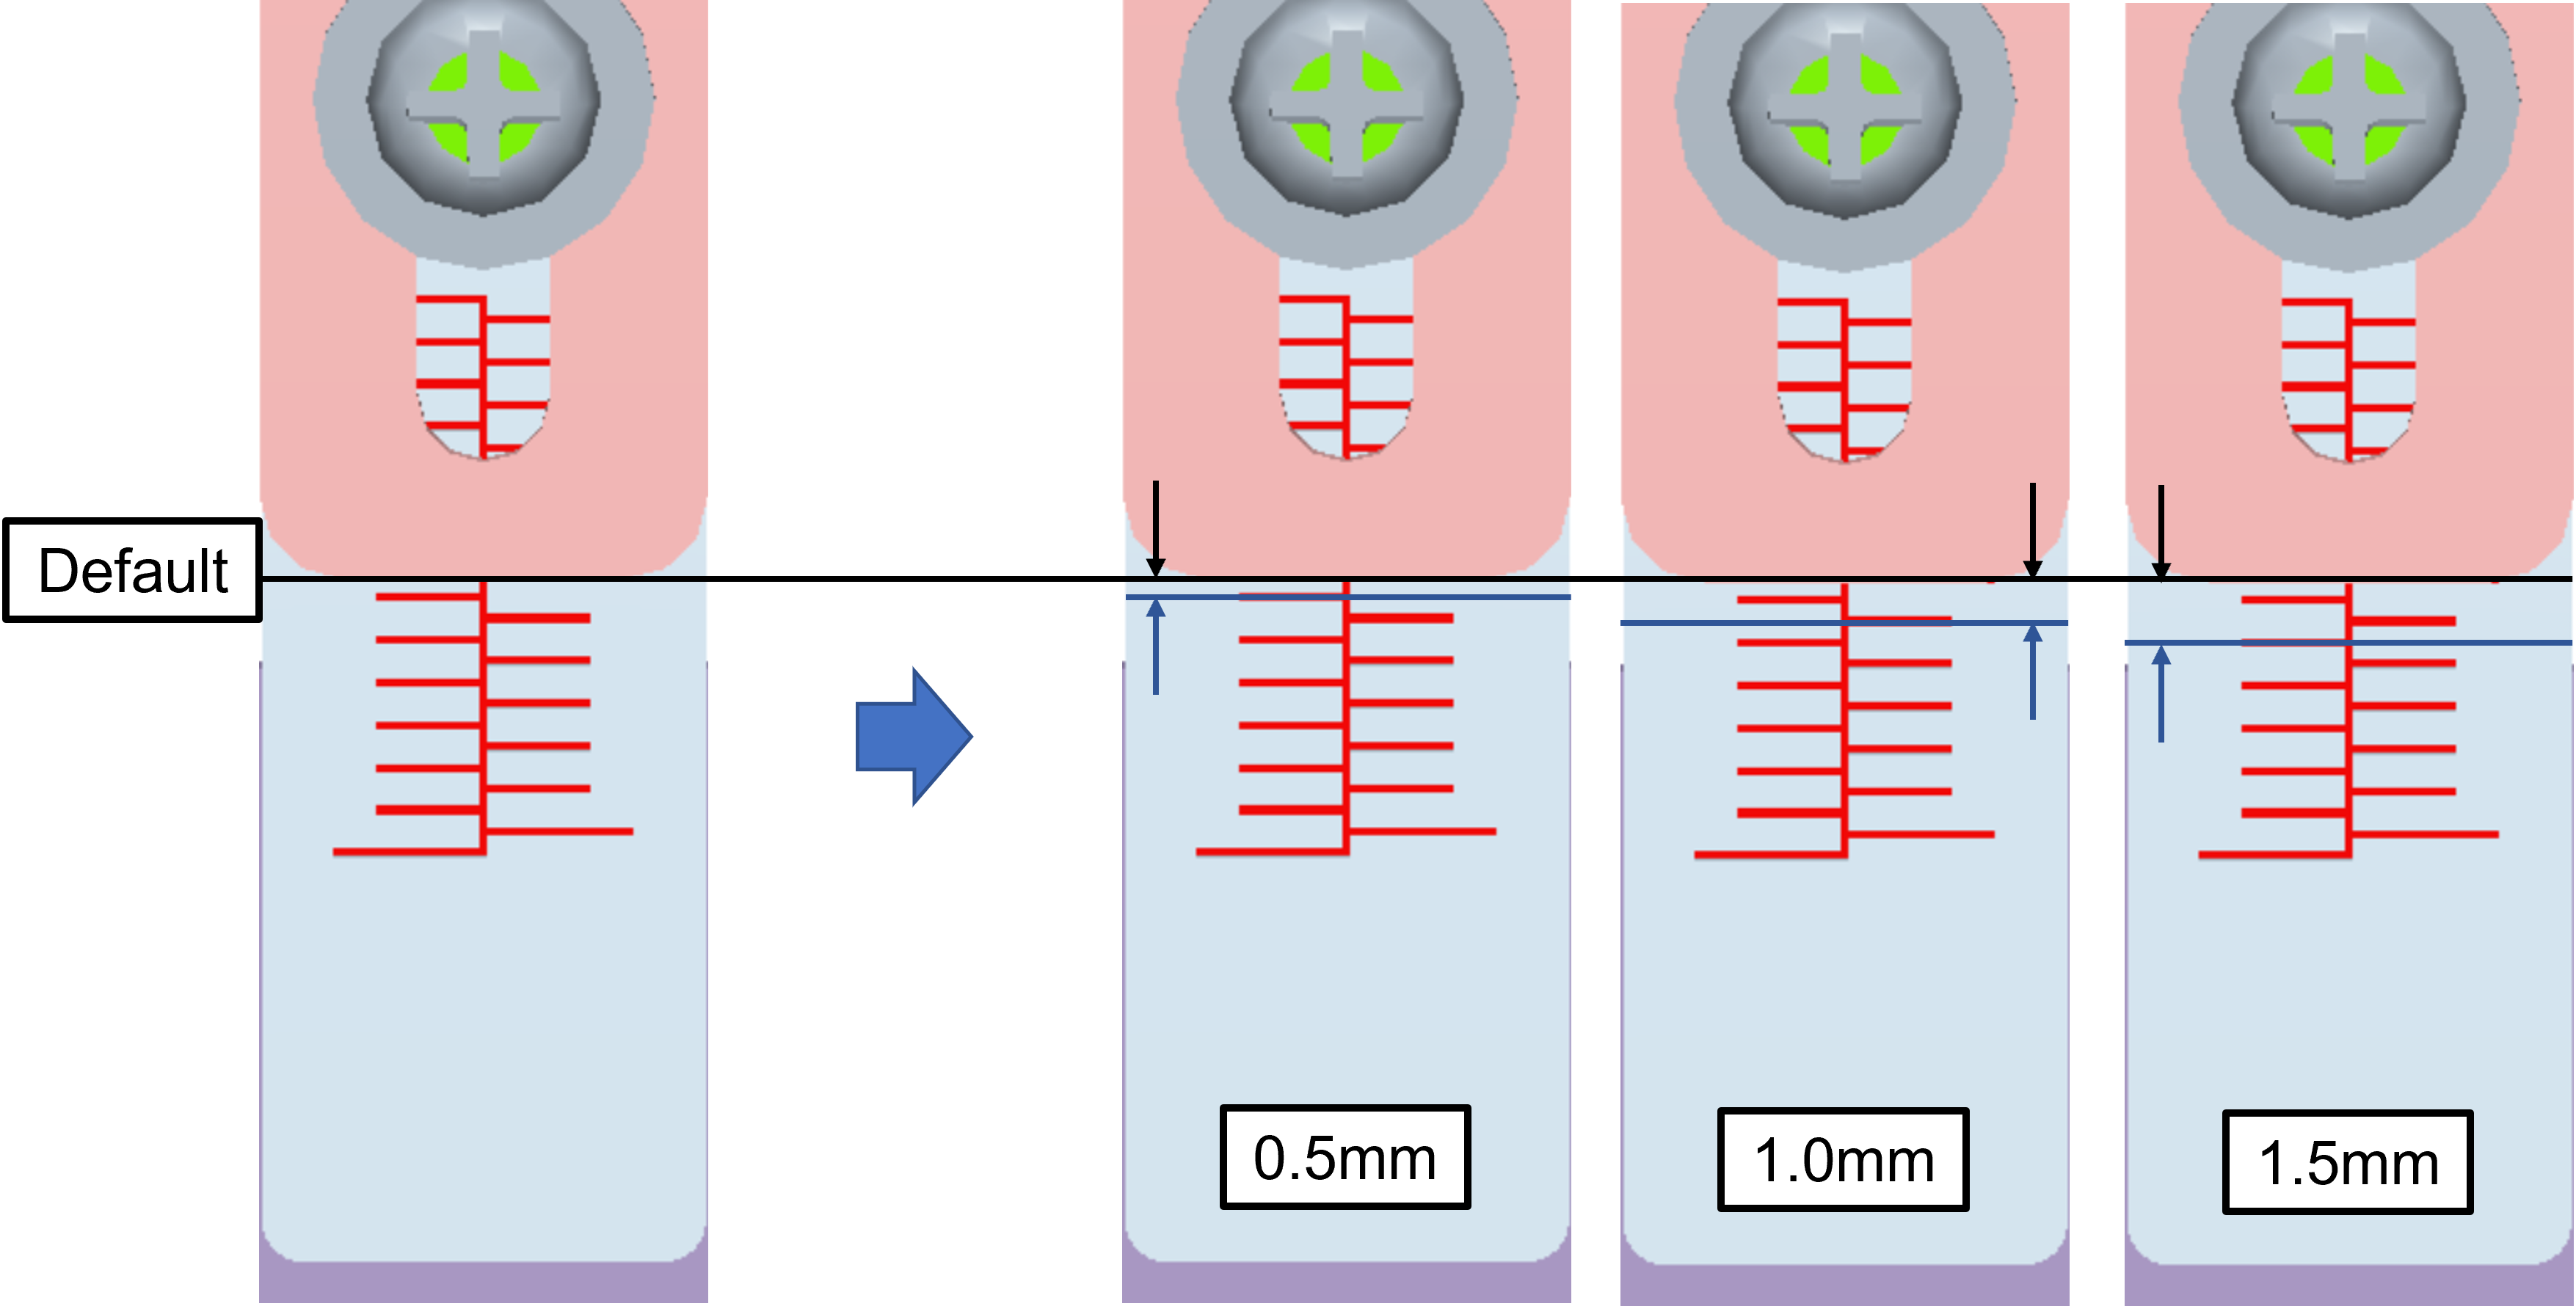
Based on the margin difference calculated from the adjustment pattern, operate the paper guide (A) on the rear side to change the position of the adjustment plate (B).

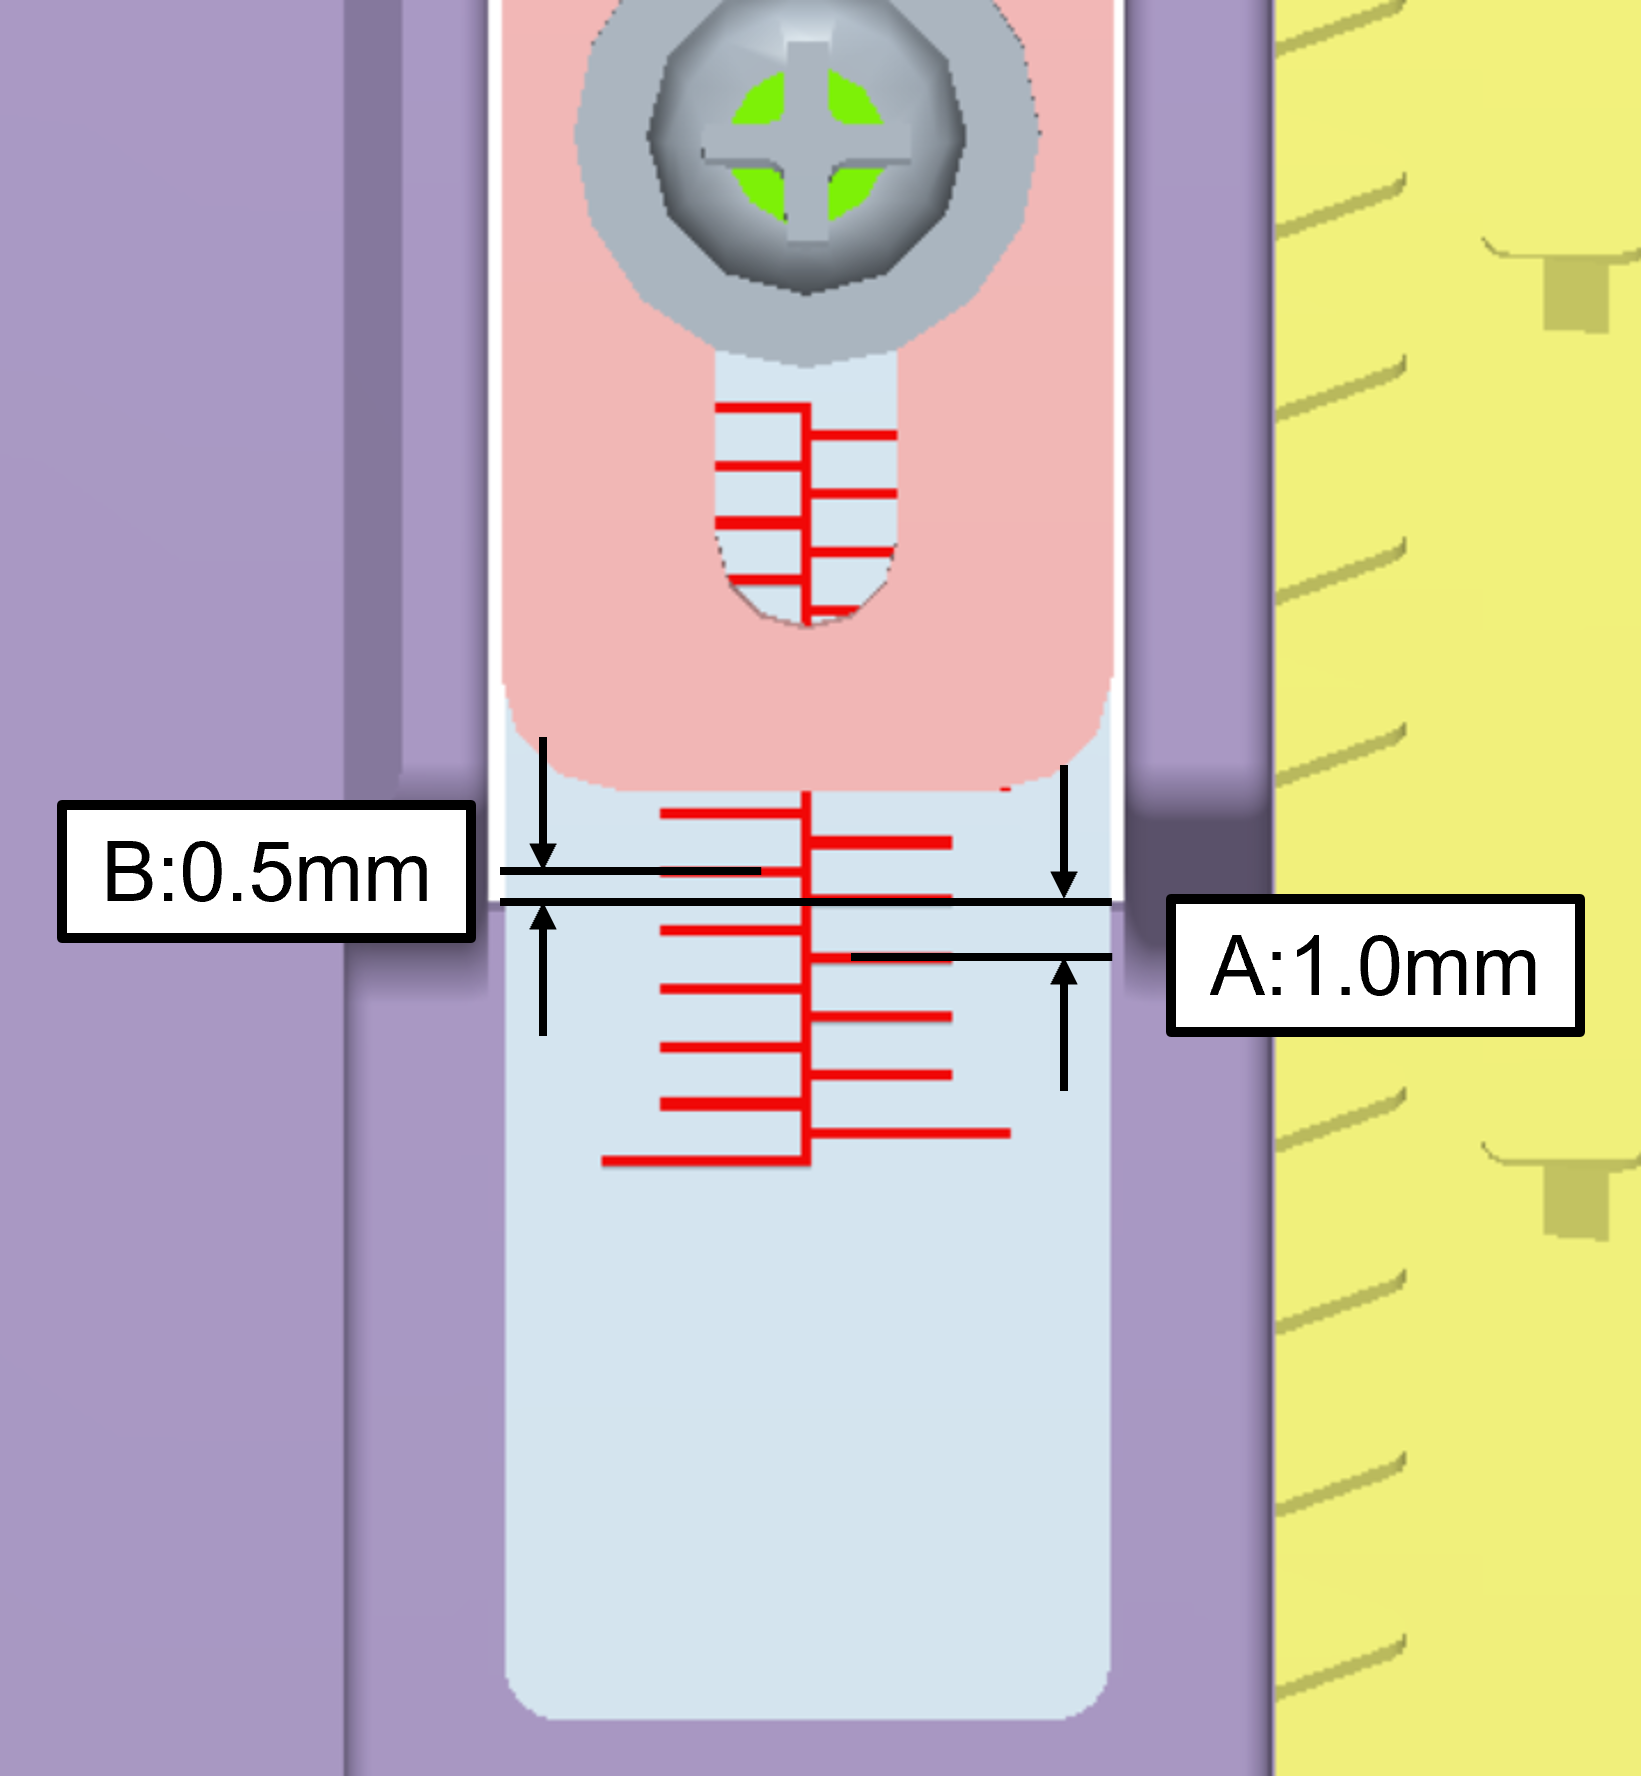
 Note / 補足
Same side scale width (A): 1.0mm, left and right scale difference (B): 0.5mm
- The direction to move the adjustment plate is as follows.
- If you want to small the margin of #1: change to the rear side of the product.
- If you want to small the margin of #2: Change to the front side of the product.
- Example of changing the adjustment plate position (The figure below is the case of moved to the front side of the product.)
After change position, tighten the fixing screw of the adjustment plate and remount the removed cassette.
Check Point / チェックポイント- When tight the screws, be careful not to shift the position of the adjustment plate.
