Authentication device stand installation procedure
Bundled Items

| No. | Bundled Items | Qty. |
|---|---|---|
| 1 | Authentication device stand | 1 |
| 2 | Bracket B | 1 |
| 3 | Screw M3 × 8 | 2 |
| 4 | Double-sided tape | 1 |
| 5 | Coin screw | 2 |
 Check Point / チェックポイント Check Point / チェックポイント |
|
Installation Procedure
Items to Prepare
- Gloves
- Phillips (+) screwdriver
Minimum number of workers
1 person
 Caution / 注意 Caution / 注意 |
|
Installation Procedure
- Remove the screw and slide the Panel Upper Cover (A) in the direction of the arrow to remove it.
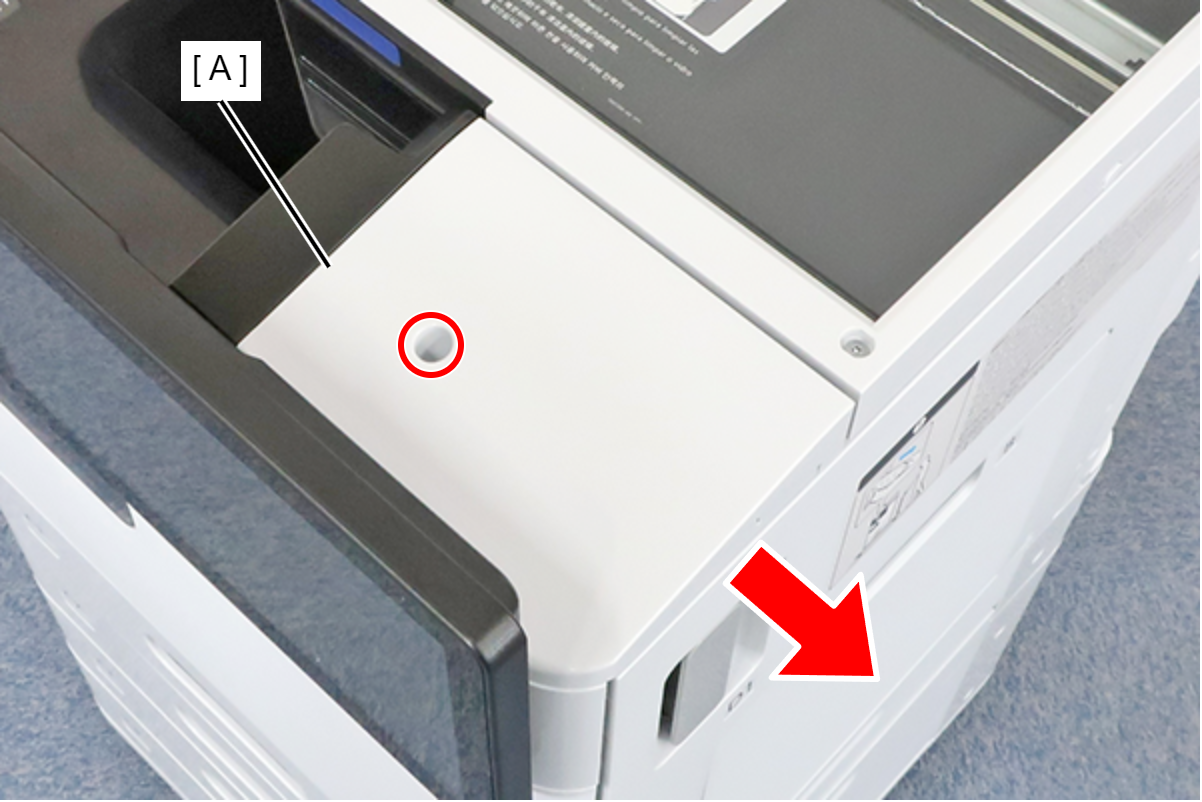
 : 3x8D
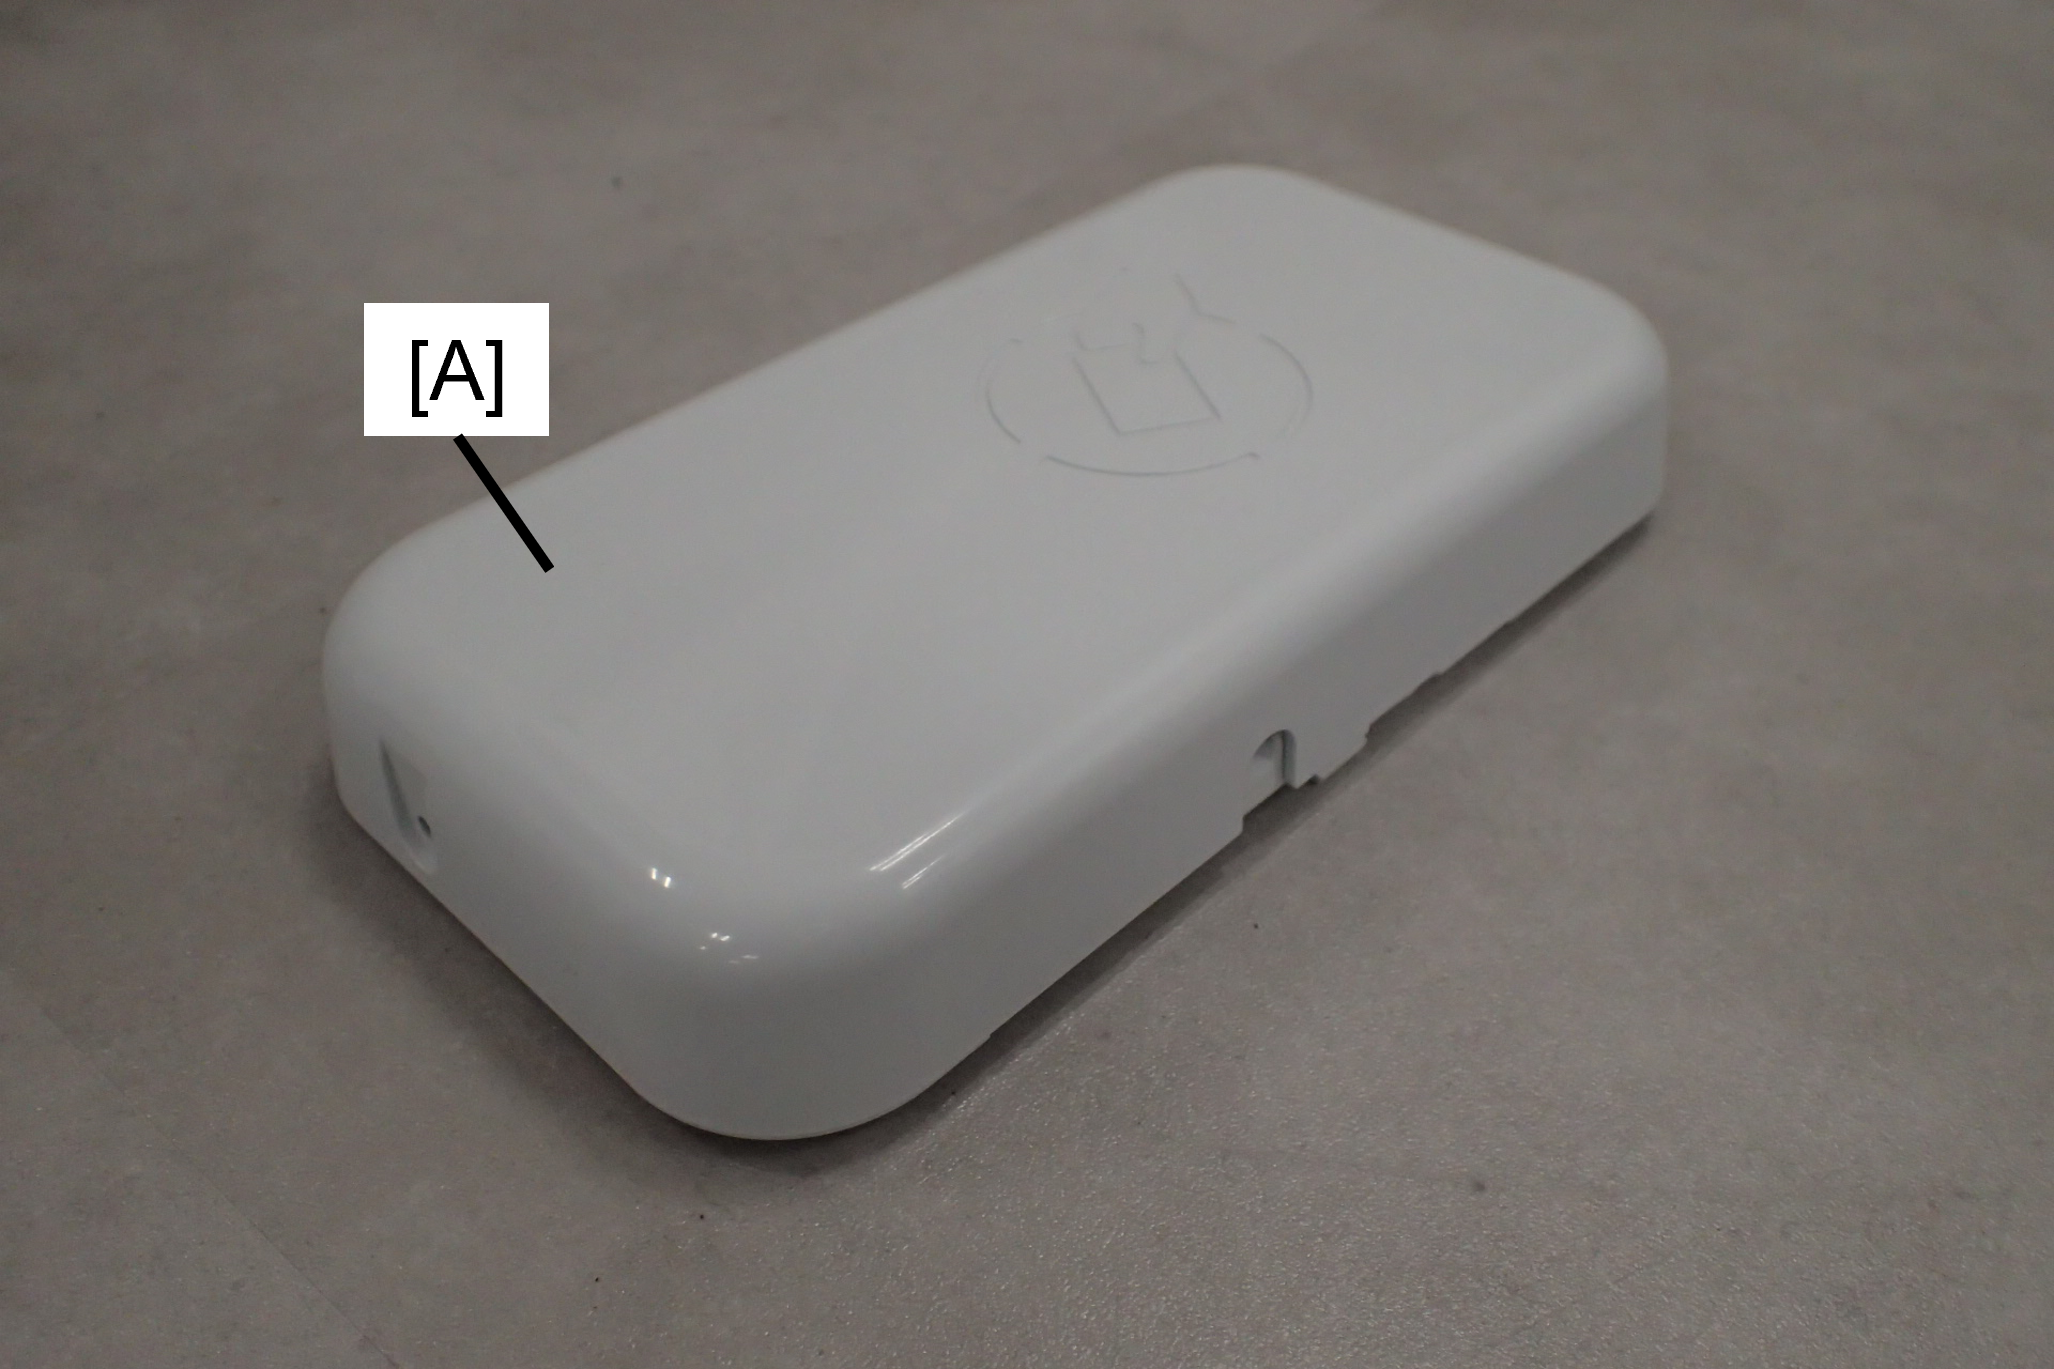
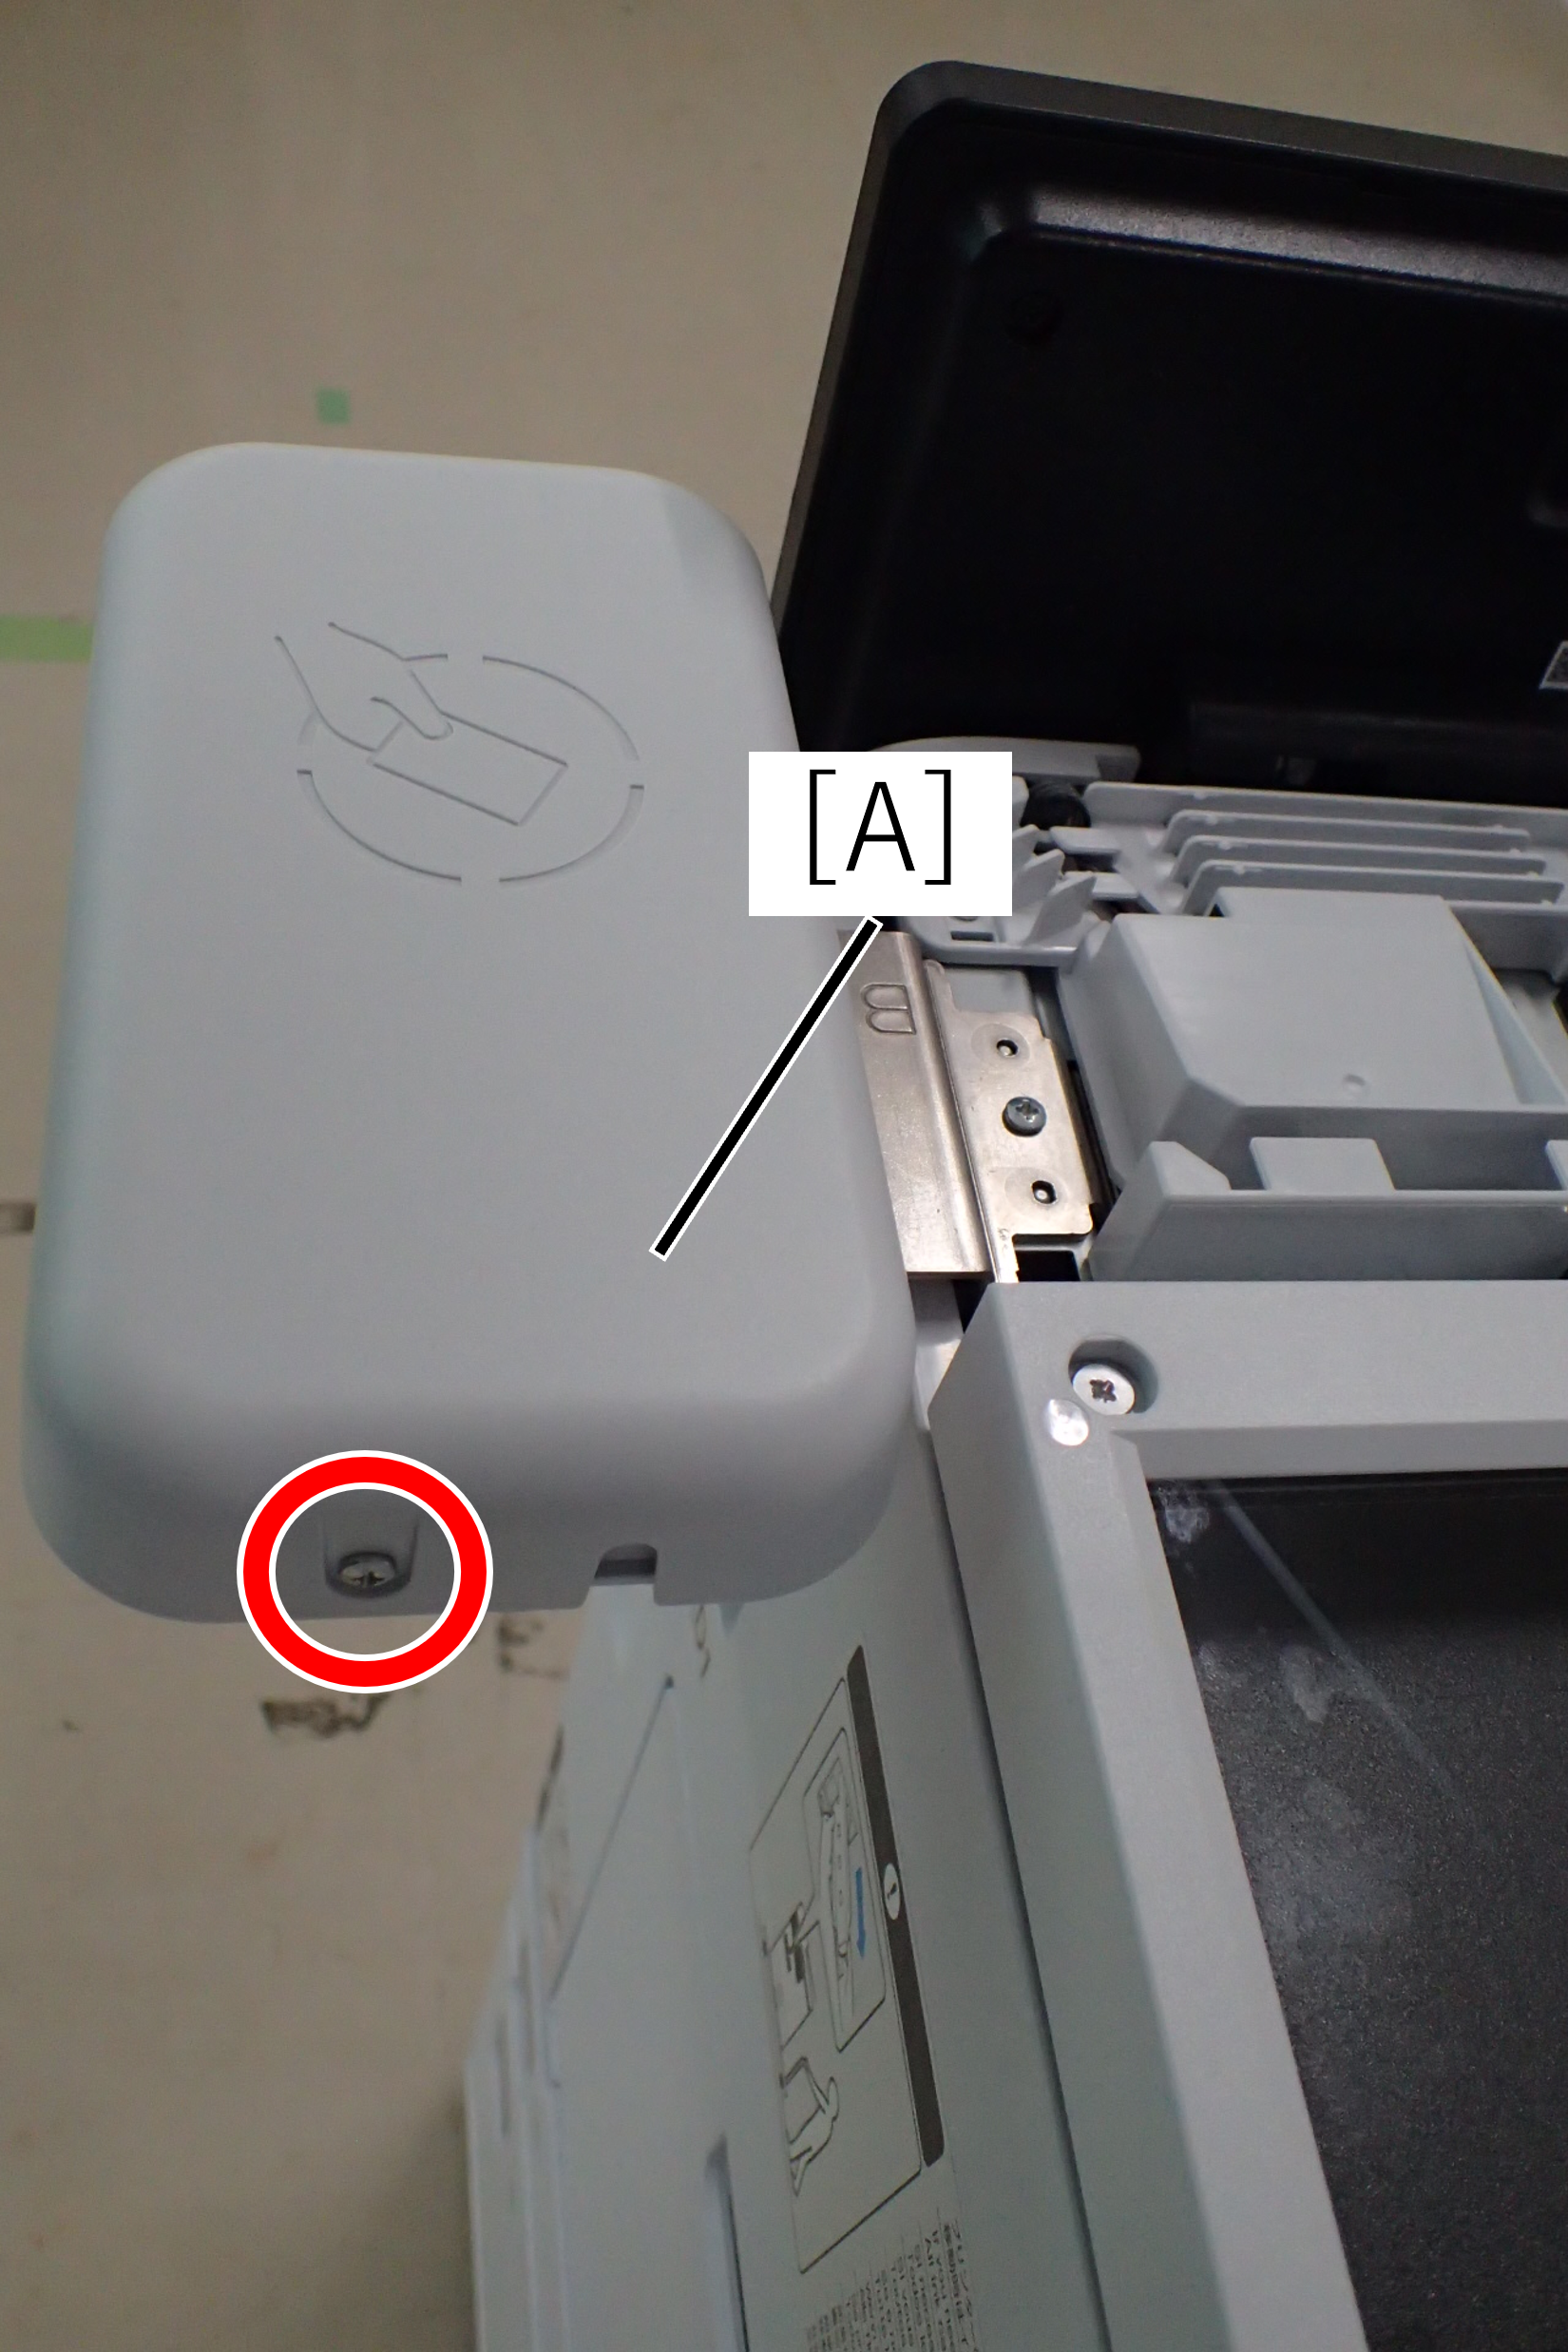
Remove 1 screw and remove the panel upper cover sub (A).

 : 3x8D/P
 Note / 補足
The removed screws can be discarded.
- Hook the 1 tab (A) on the bracket to the 1 hole (B) on the main unit, and attach the bracket (C).

- Secure the bracket (A) with 1 screw.

- : 3x8D/P
- Remove the upper case (A).
- : 3x8D/P
- Align the hooks (A) on the device pedestal with the grooves (B) on the bracket and attach the device pedestal (C).

- Secure the device pedestal (A) and the device base (B) together with the one coin screw.

Attach the authentication device to the device base.
Note / 補足When attaching the authentication device, you may use the included duplex tape if necessary.
- Attach the device table top case (A) and fix with 1 screw.
- : 3x8D/P
- Install the panel upper cover (A) and secure it with one screw.

- : 3x8D/P