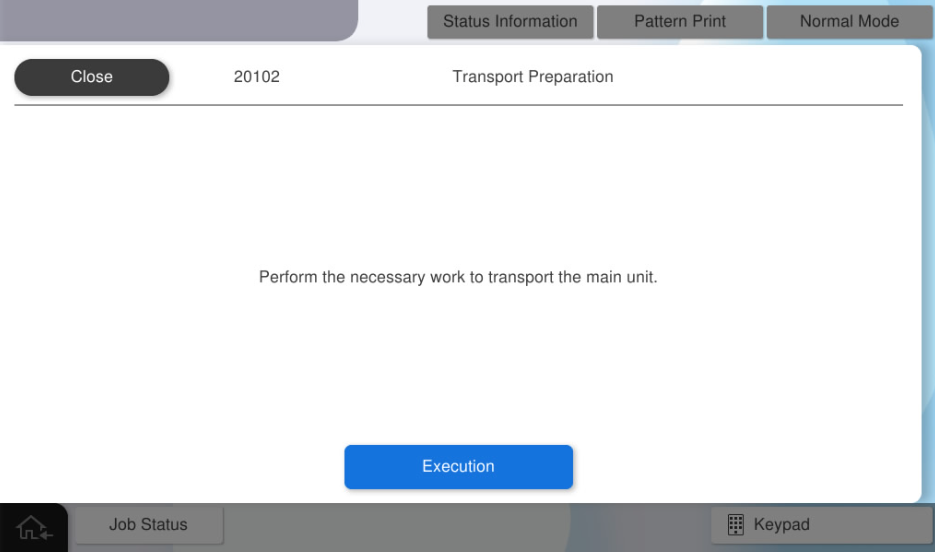
20102 Transport Preparation
Overview: Because the product is transported with ink inside, the necessary processes must be implemented sequentially.
 important / 重要 important / 重要 |
|
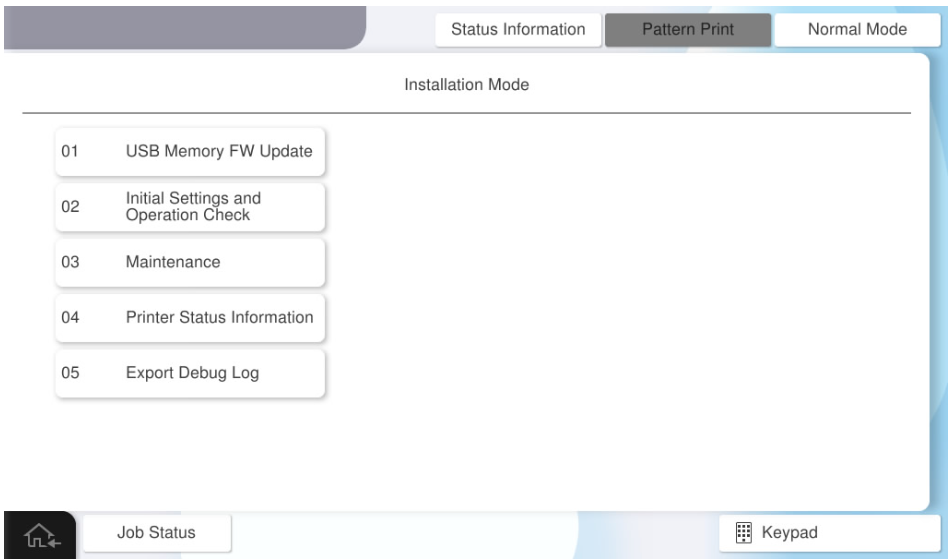
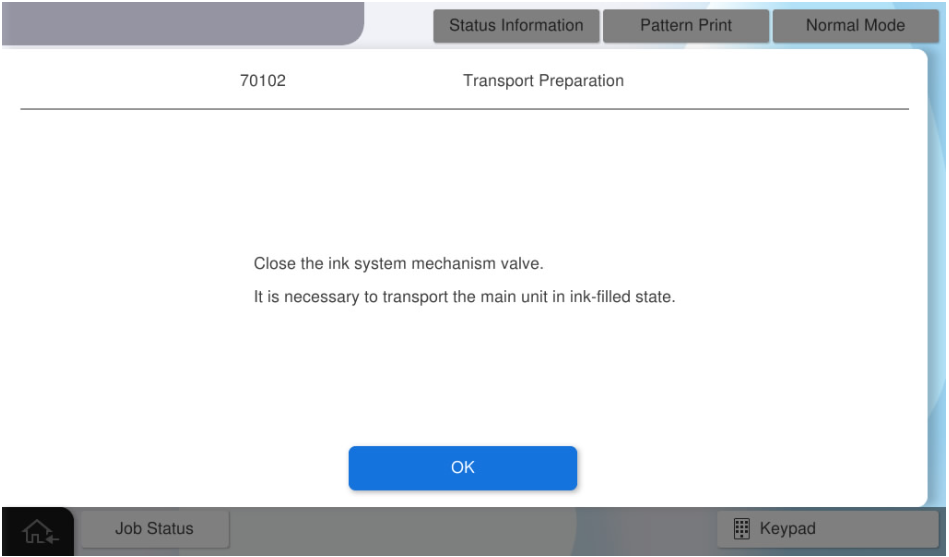
- Start installation mode.
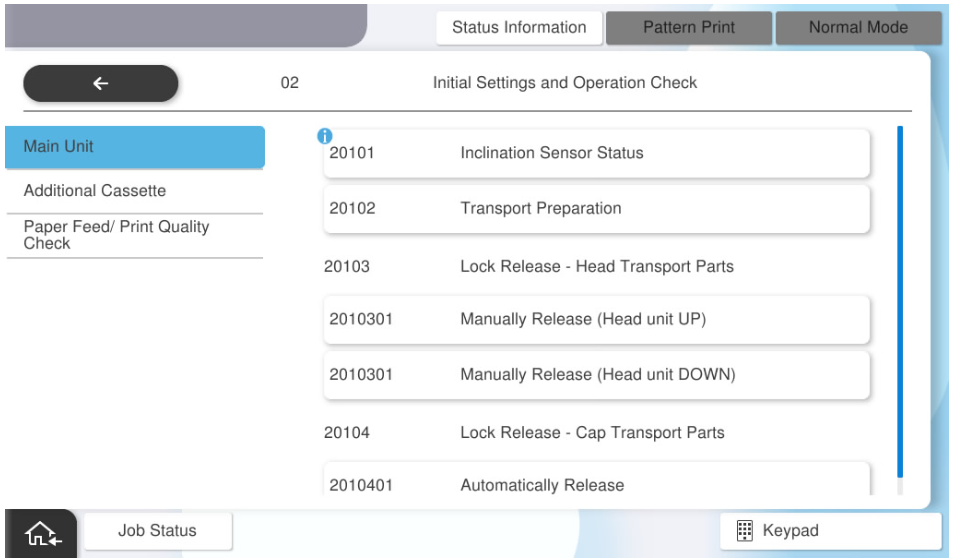
- Select [02 Initial Settings and Operation Check].
- Select [20102 Transport Preparation]
- Select [Execution].
Select [OK].
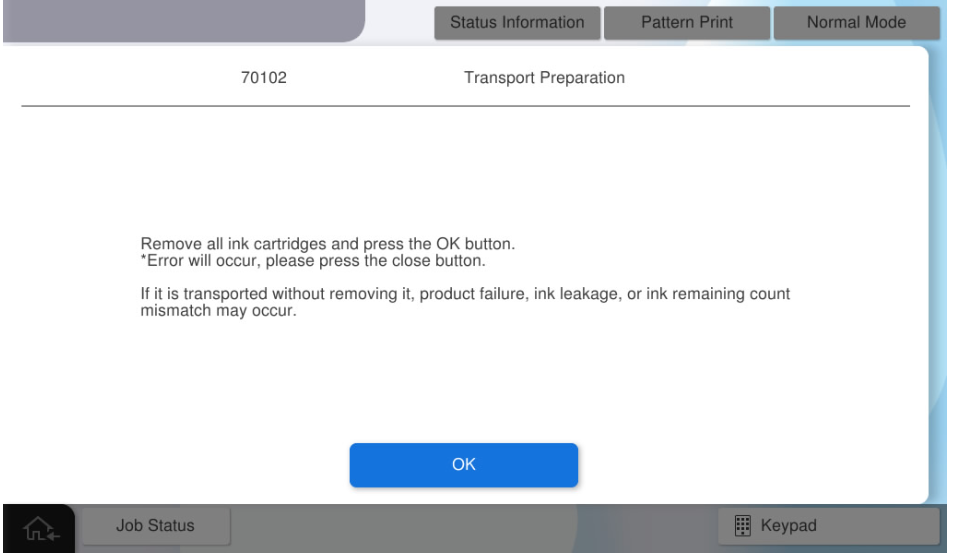
- If the following screen appears, open the front cover and remove all ink cartridge colors from the product main unit.
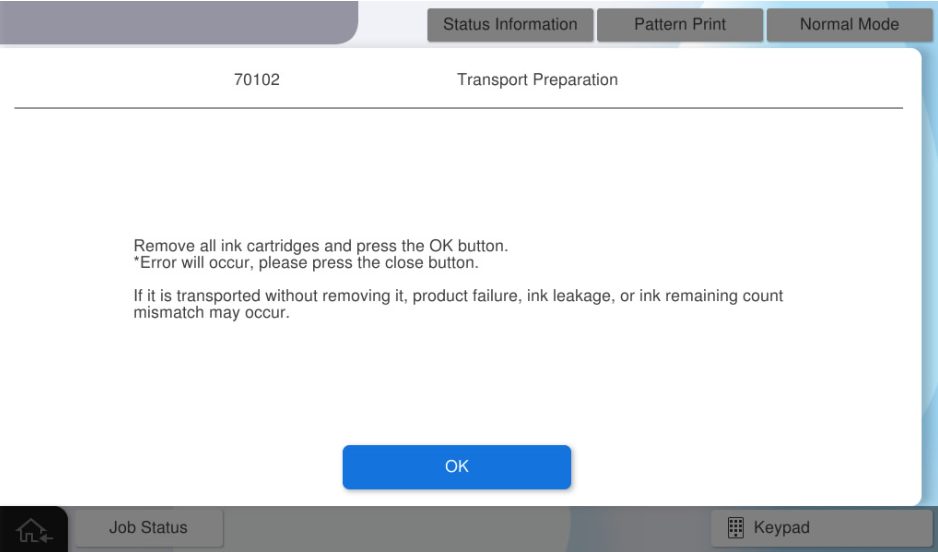
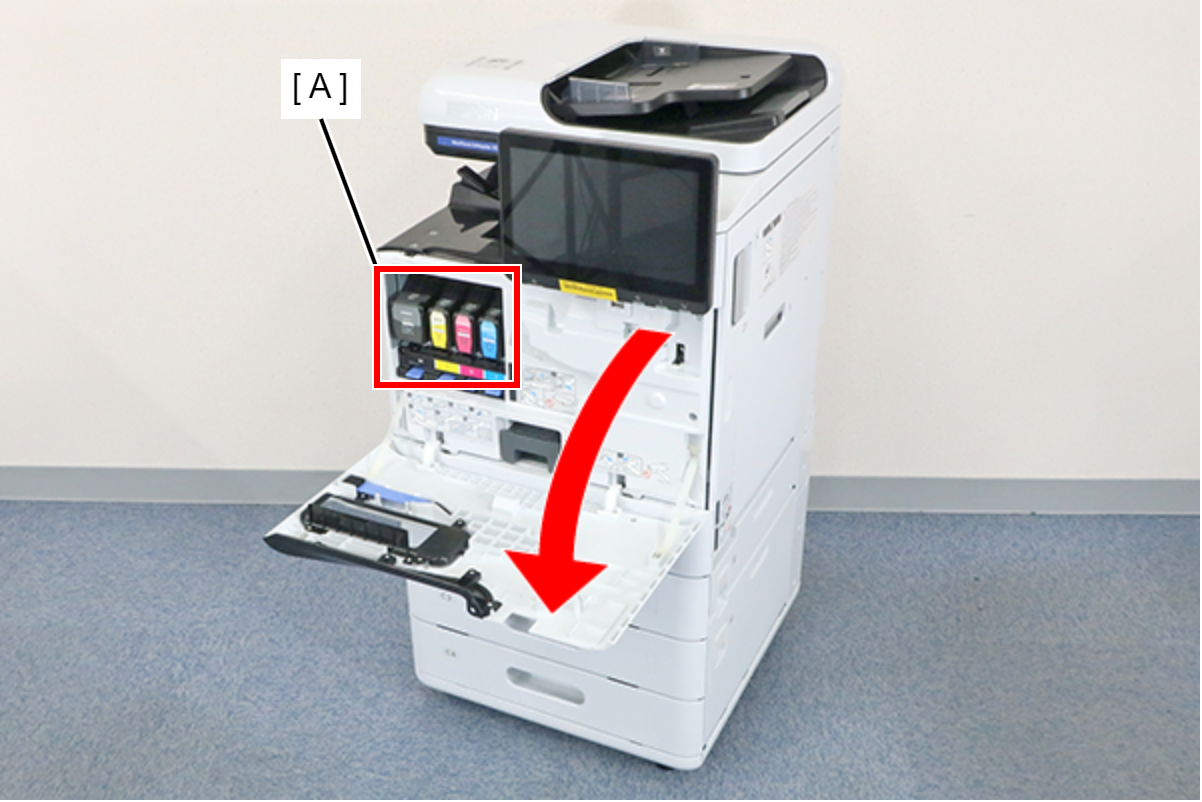
Open the front cover and remove all ink cartridges (A).
 Caution / 注意
Immediately attach the ink supply port cap (A) to the removed ink cartridge.
If the ink supply port cap is not attached, ink remaining in the supply port may drip. (Ink cartridge )
- Once you close the front cover, a maintenance error will occur because the ink cartridges are not inserted, however, the error can be cleared by pressing the close button.
When the task is completed, select [OK].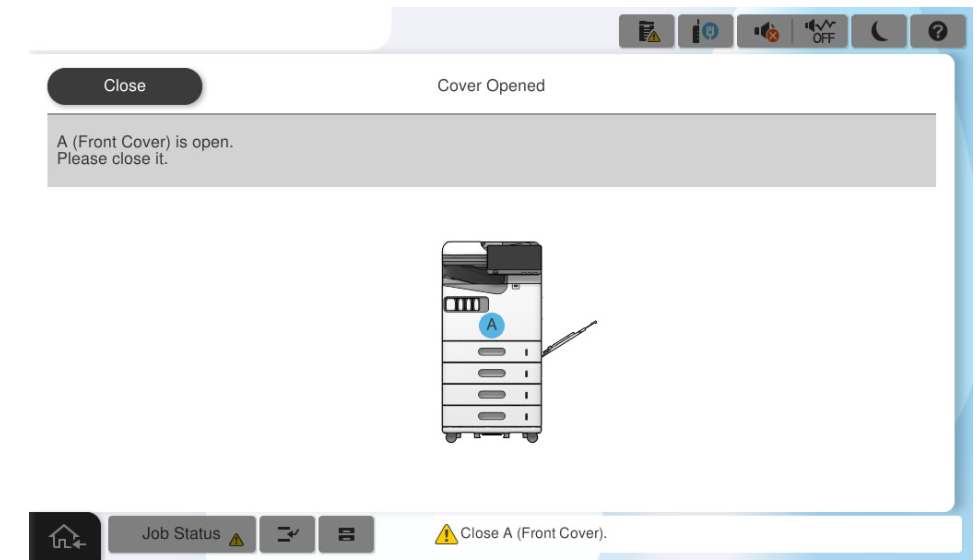
Turn Off the main unit when the following screen is displayed.
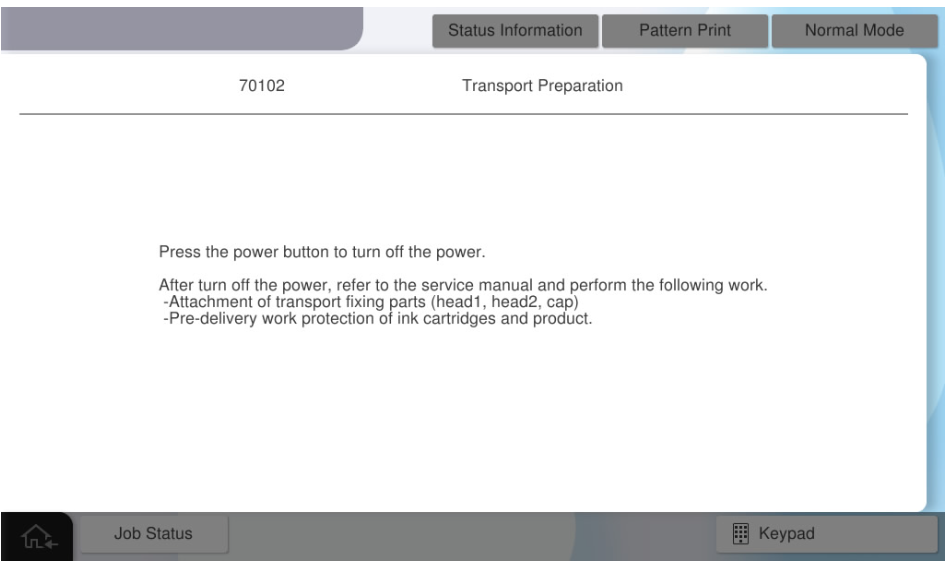
Use transportation parts and simple protective materials (Protecting the products to avoid damages while transporting) to complete transportation preparations.
 Note / 補足
- This setting is automatically canceled when the power is turned on (air valve opens). Even if transportation is not completed after executing this menu, it must be executed again if the power is turned on accidentally.
- Complete the following once transportation is completed.
- Install the ink cartridges before turning on the power.
- Start the service support mode, print the print quality check pattern, and check the print quality. (Check Pattern )
- If defective printing occurs, perform head cleaning (Head Cleaning) in service support mode.
If ink color mixing occurs, execute CL0 or CL1.
- Other defective printing (nozzle missing or flight bending) occurs
- This setting is automatically canceled when the power is turned on (air valve opens). Even if transportation is not completed after executing this menu, it must be executed again if the power is turned on accidentally.
After completing transportation, make sure to remove the transportation parts and simple protective materials (Protecting the products to avoid damages while transporting) before turning the power on.
Also install the ink cartridges.- If you turn the power on, the following screen appears. Select [Execution].
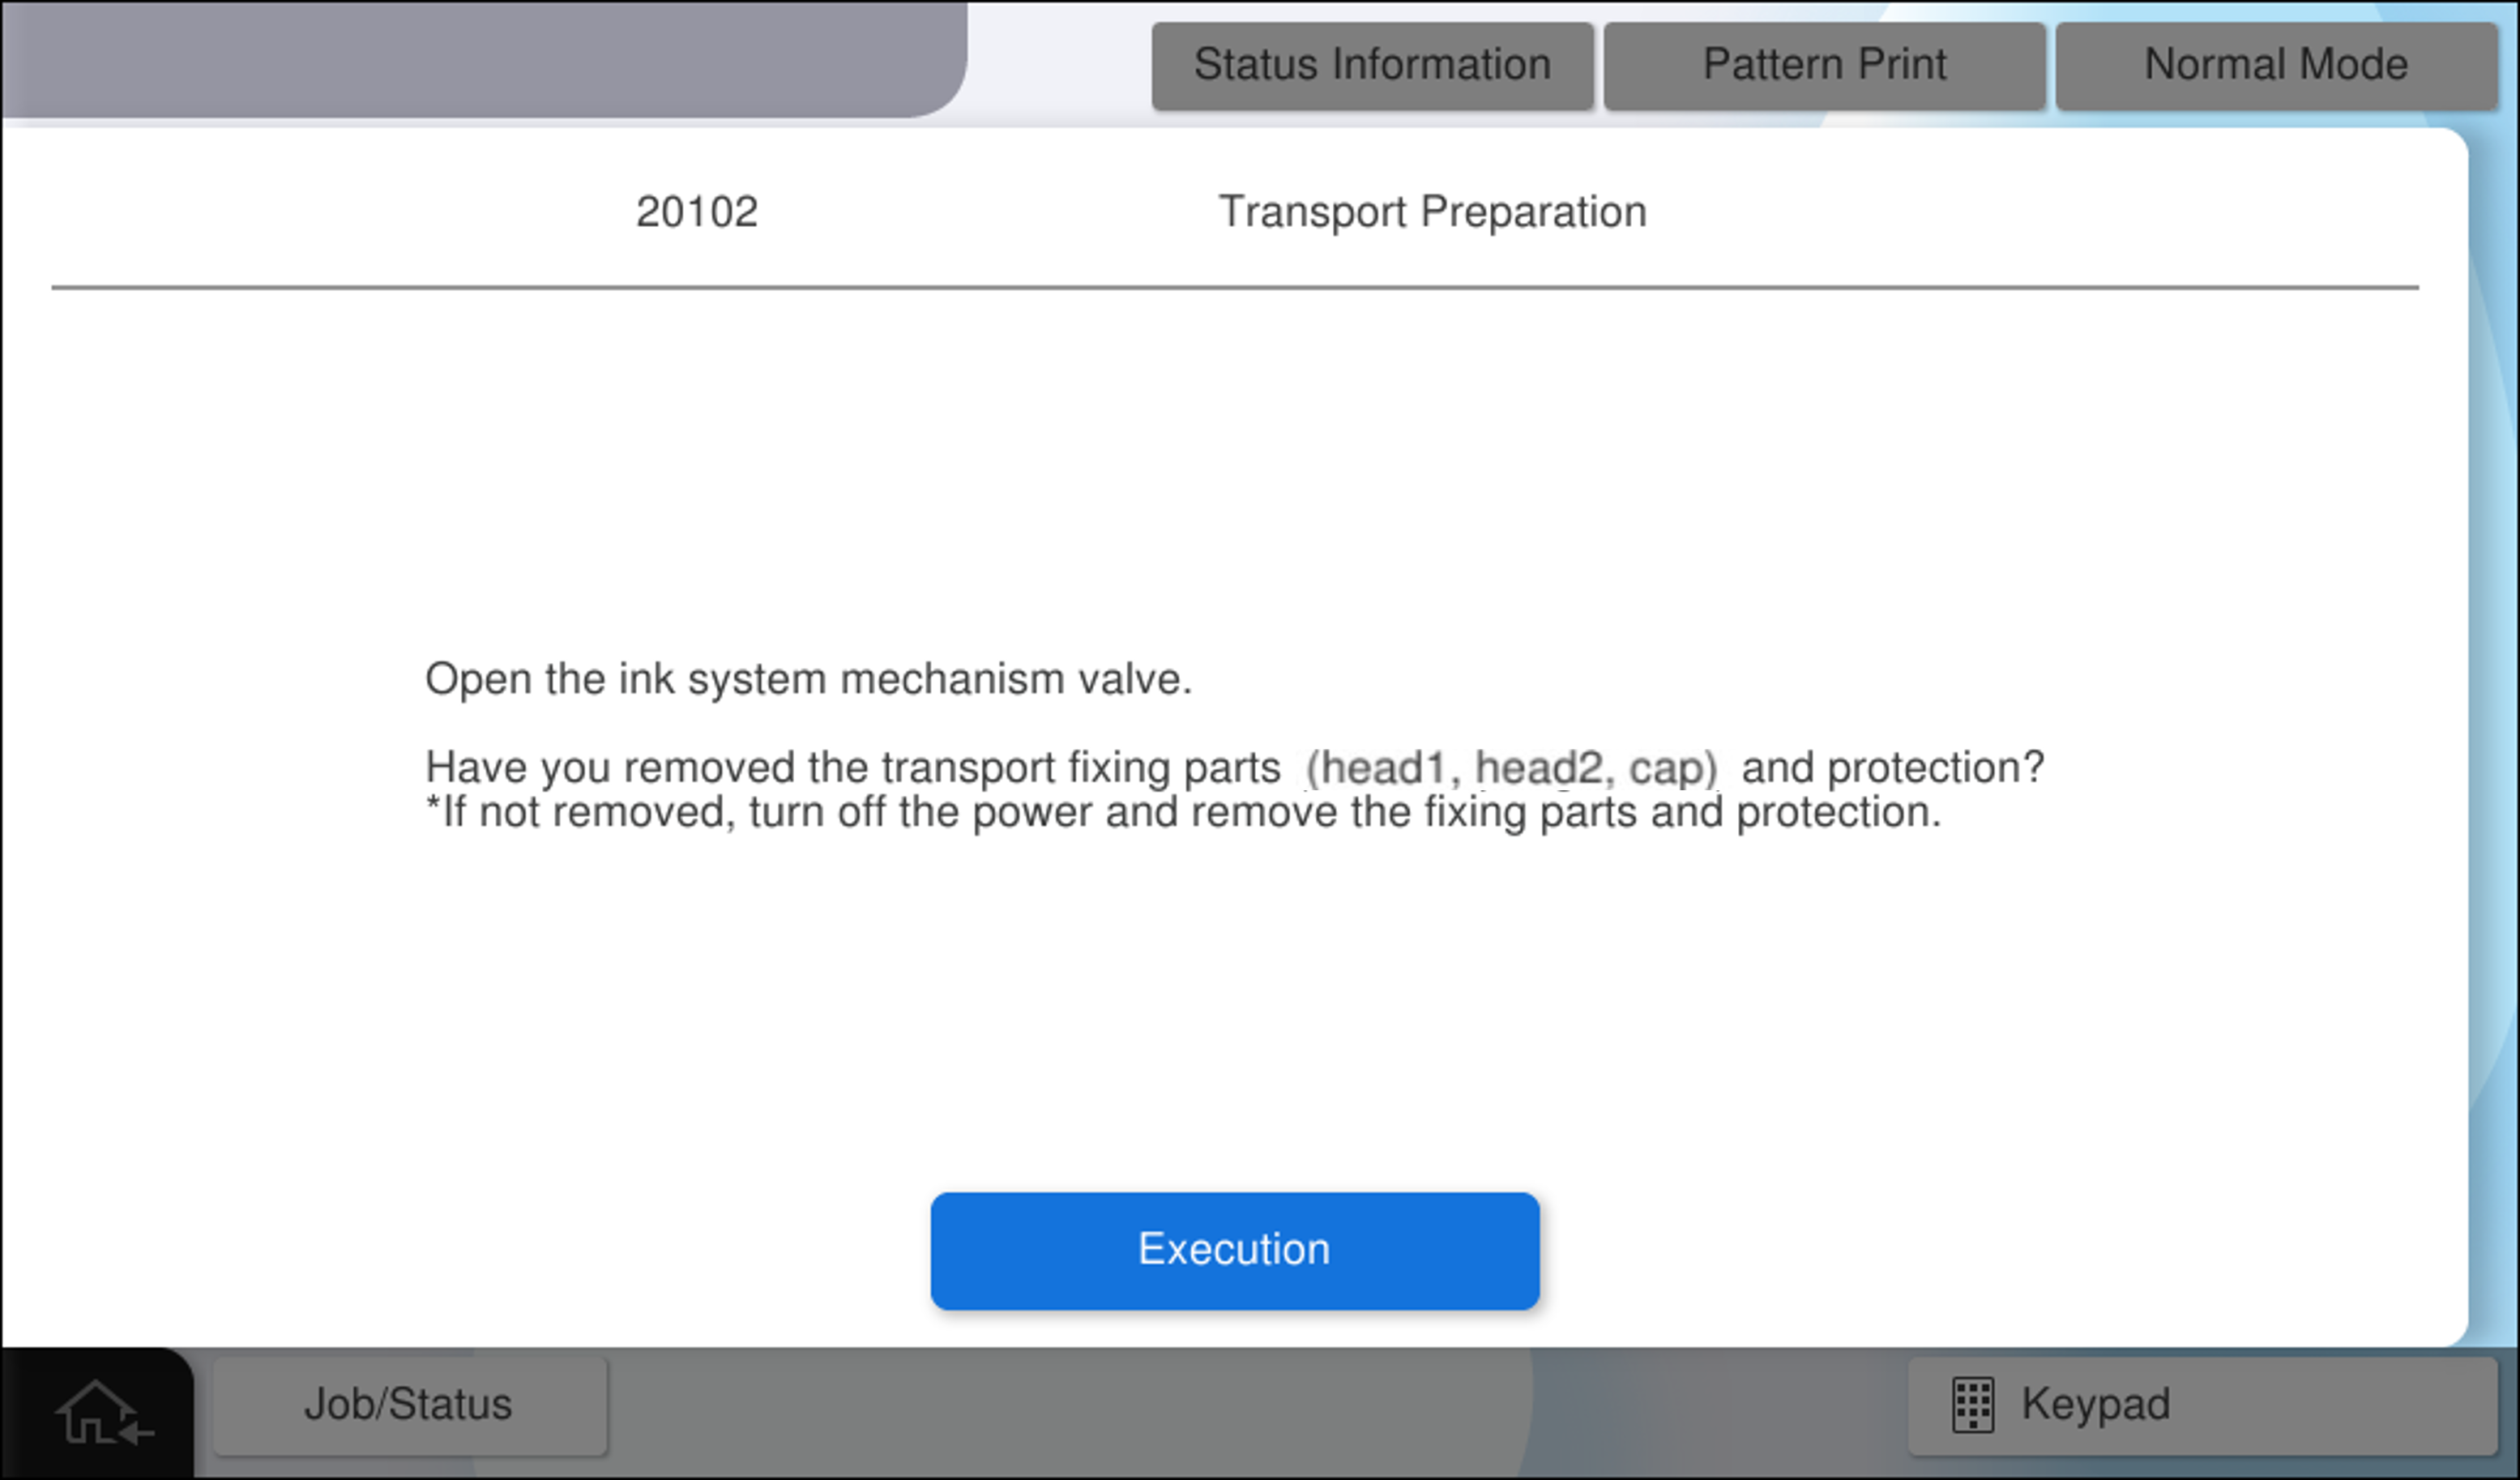
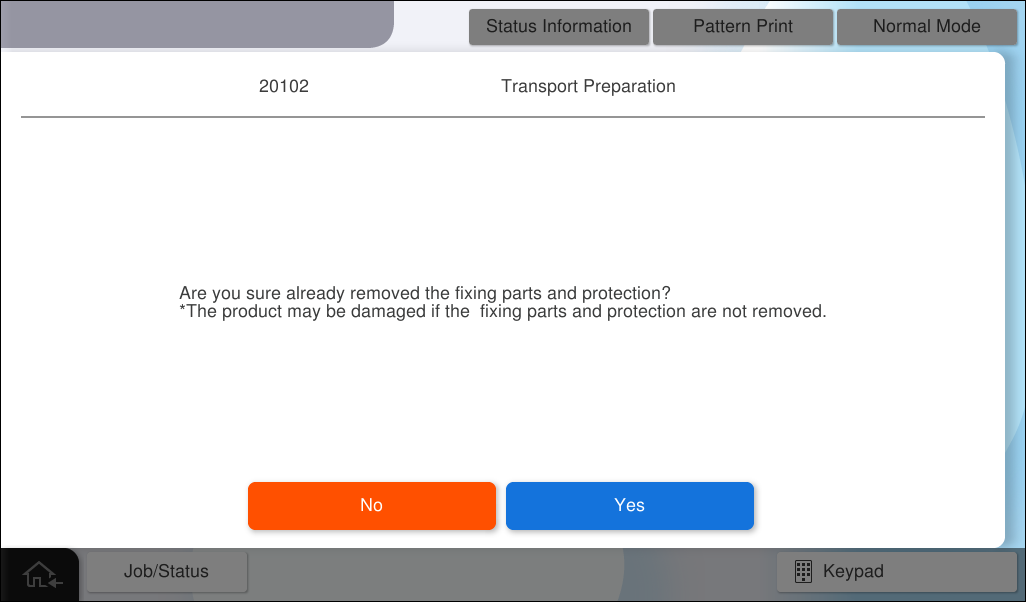
- A message appears checking if you removed the transportation parts and protective materials.
If you have, select [Yes].
 Check Point / チェックポイント
- If you have not, turn the main unit power off and remove the transportation parts.
- The product will not allow mechanical operations until the [Yes] button is pressed.
This screen will automatically be displayed.
- Perform the process for opening the air valve (automatic).

- Turn Off the main unit when the following screen is displayed.
