Main Unit Installation Procedure
 Caution / 注意 Caution / 注意 |
Be sure to check the following precautions before installation.
|
Items to Prepare
- Main Unit included items
- USB memory (to store the latest firmware)
Installation Procedure
Connect the Power cable between Main Unit and the electrical outlet.
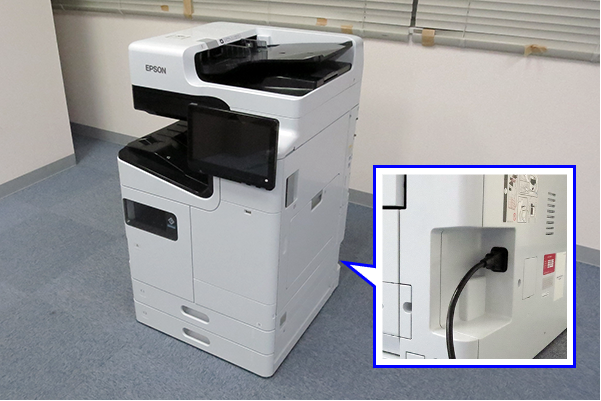 Caution / 注意
- Confirm that there is no condensation inside the product before turning on the power.
- If condensation occurs, the fatal error (031008, 034209) may occur. Turn off the power immediately and leave it to dry (about 12 hours). If the power-on state continues, it causes a head failure.
Attach the Document holder.
 Note / 補足
There are 2 choices of place to attach the Document holder. Make sure to confirm customer requirements, install or not install the Floor Finisher.
- Back side
- Left side (Without the Finisher Unit only)
Peel off the 4 Blindfold seals.
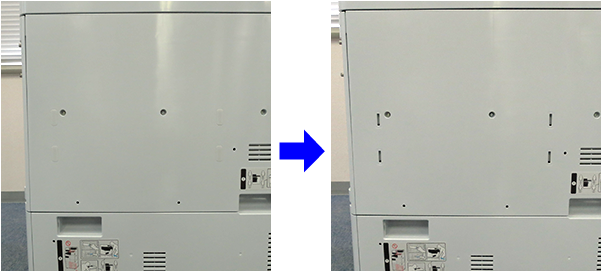
Insert the hook (x4) of the Document holder into opening of the cover and attach it.
- Back side
Remove the releasing paper from the Cleaning cloth holder, and attach to appropriate position of the Main Unit.
 Note / 補足
Make sure to confirm customer requirements where to attach.
Holds the Cleaning cloth.
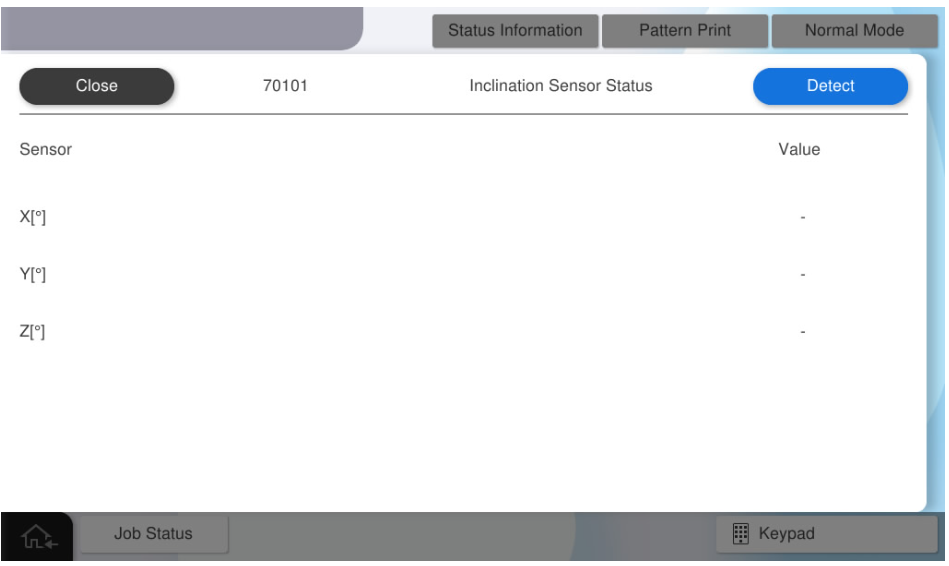
Check the setup inclination of the main unit.
Caution / 注意- A fatal error (034871) occurs when the main unit is tilted by +/- 3° or more. In this case, it is necessary to change the installation environment or take individual measures to correct the posture.
- Even if a fatal error does not occur, the setup inclination may change over time depending on the material of the installation floor (product sinking occurrence, etc.). Therefore, make sure to check the setup inclination at the time of installation, and take the measures described above as necessary.
Start the service support mode.
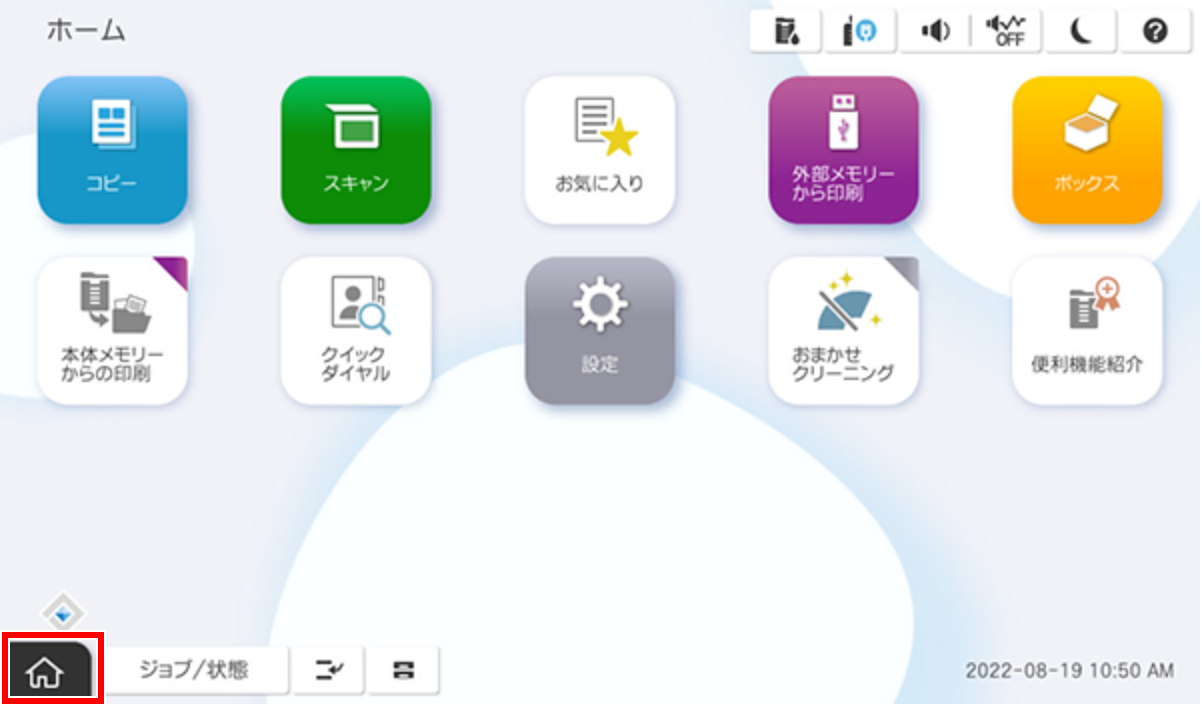
Select [07 Installation Setting / Operation Check].
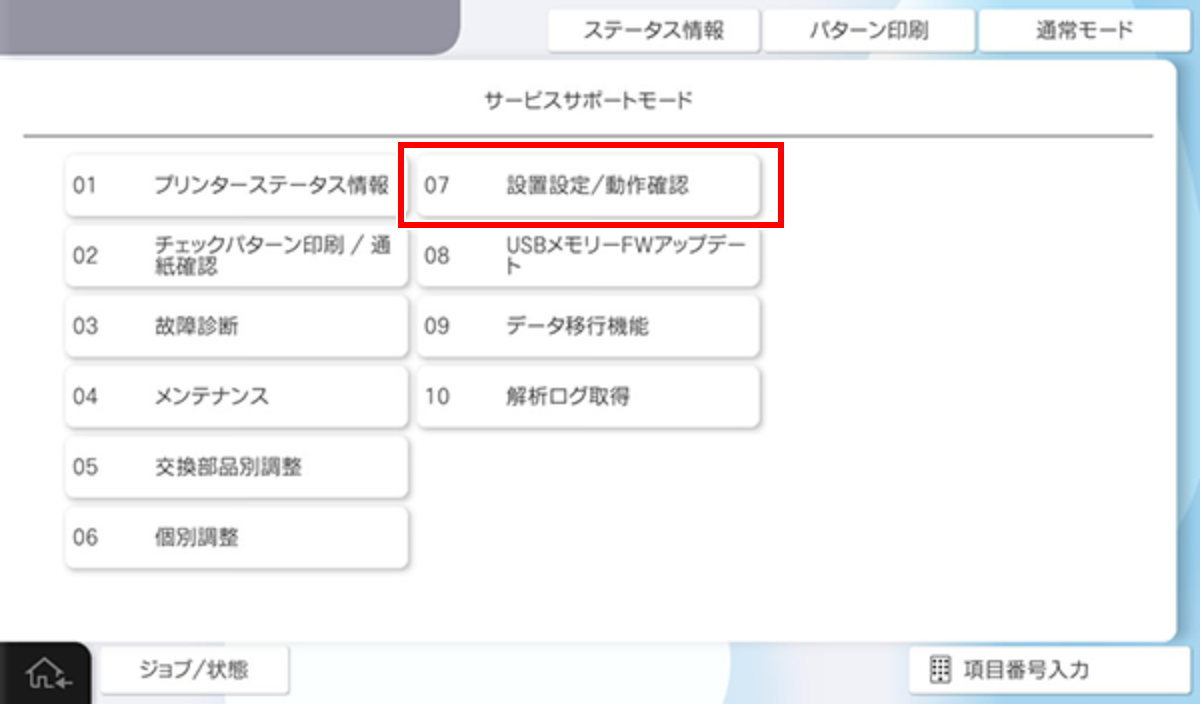
- Select the [Main Unit] tab, and select [70101 Inclination Sensor Status].
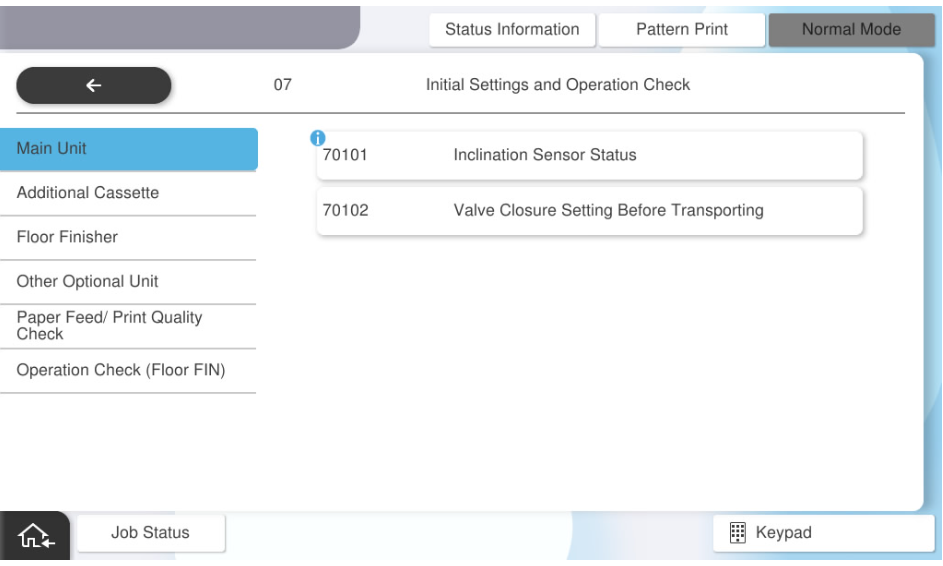
Press [Detect] and check the values displayed for X[°], Y[°], and Z[°].
Note / 補足- There is no problem if the values of X and Y are within ±3°.
- There is no problem if Z is a value near 90°.