Floor Finisher Initial Adjustment Procedure
Settings Procedure
- Start the installation mode.
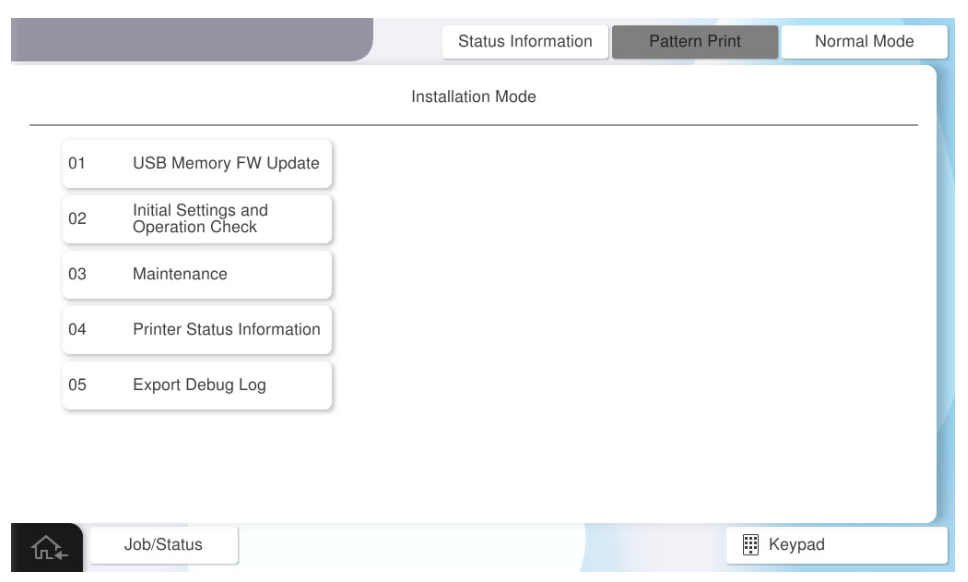
- Select [02 Installation Setting / Operation Check].
- Select the [Floor Finisher] tab.
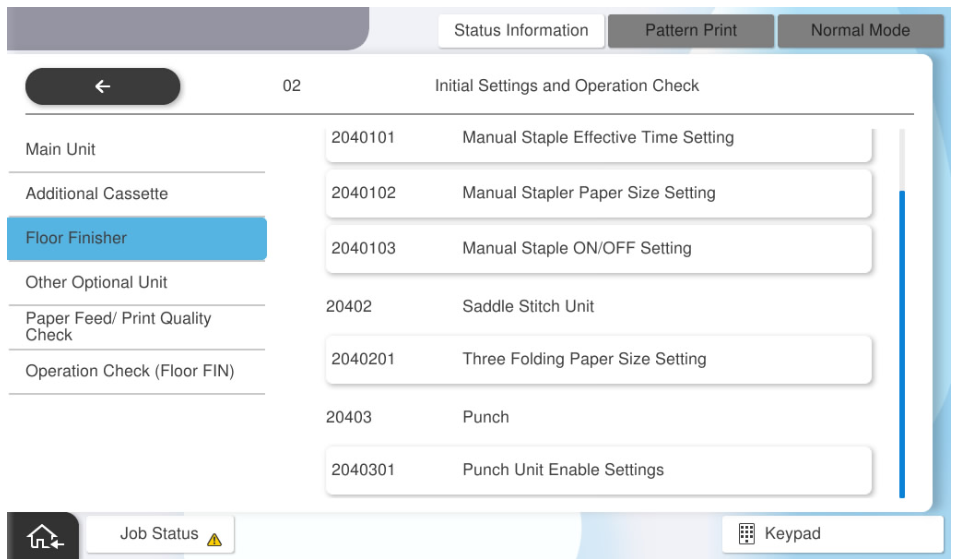
- Select [Manual Staple Effective Time Setting.]
- Select [Release Timing].
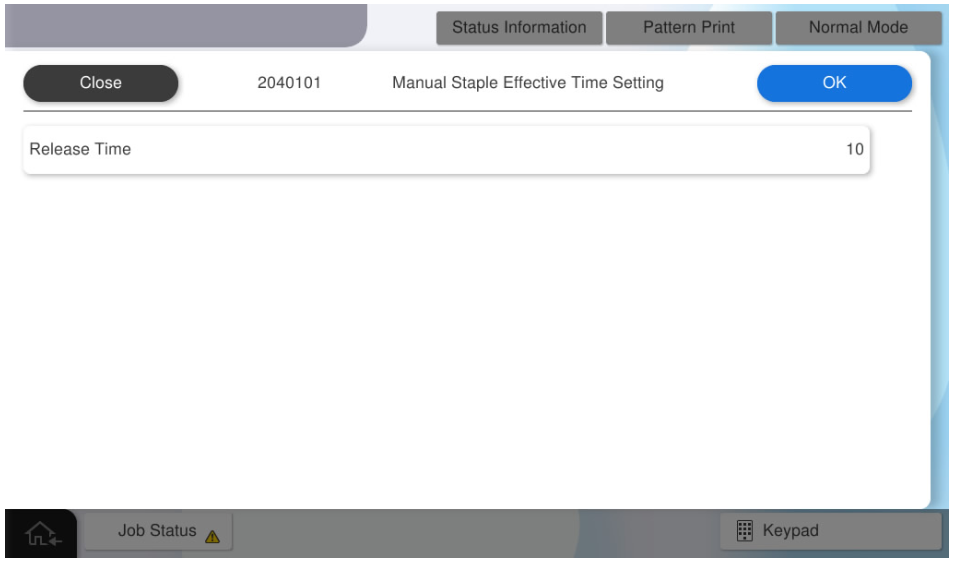
- Input the release time and press [OK] .

- Press [OK].
- Select [Manual Staple Paper Size Settings].
- Select [Paper Size].
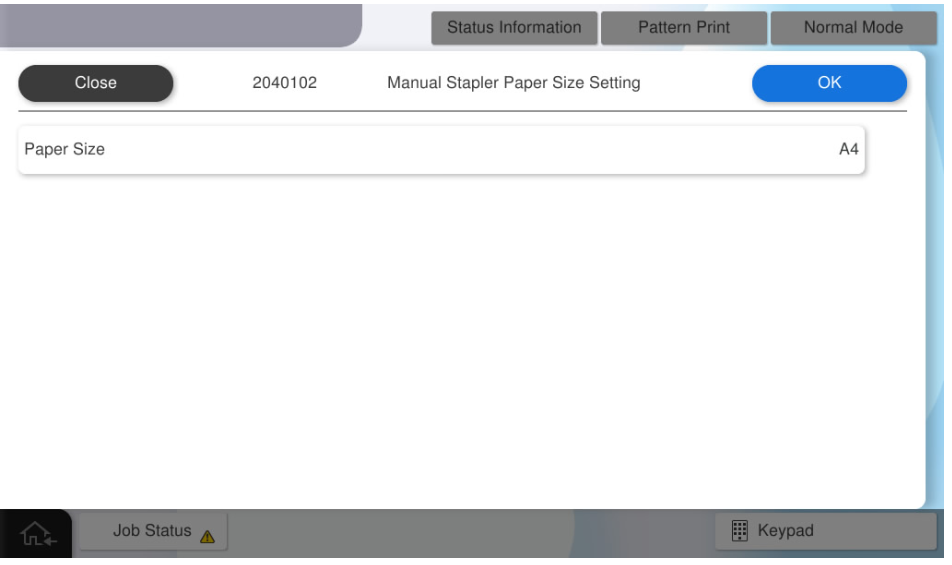
- Select the paper to use.

- Press [OK].
- Select [Manual Staple ON/OFF Setting].
- Select [Available Setting].
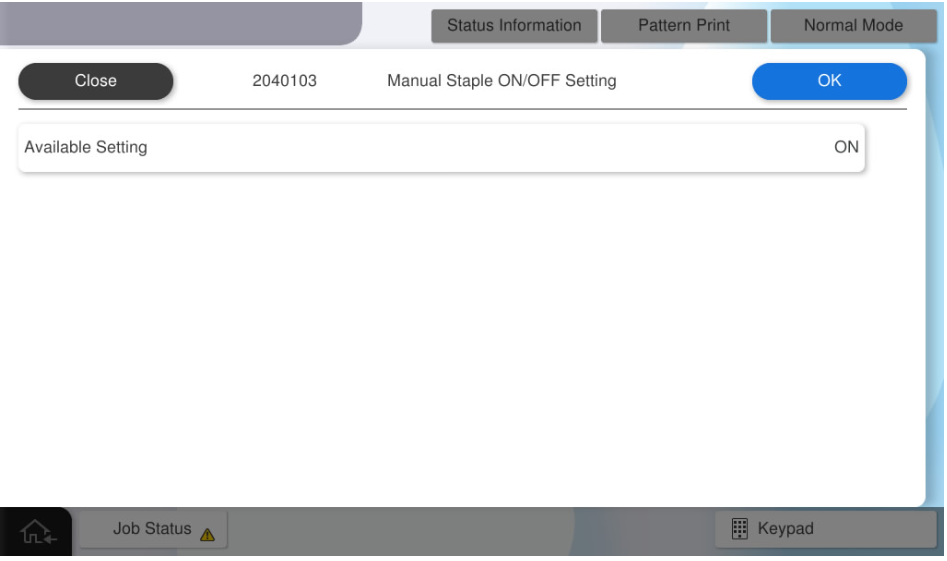
- Press [ON].

- Press [OK].
Operation Check
When installing the floor finisher, check the following operations.
- Staple Stack (Rear 1 position)
- Staple Stack (Front 1 position)
- Staple Stack (2 positions)
- Shift Stack
- Straight Stack (Sub Tray)
- Straight Stack (Top Tray)
- Start the installation mode.
- Select [02 Installation Setting / Operation Check].
- Select the [Operation Check(Floor Finisher)].
- Select [Staple Stack (rear 1 position)].
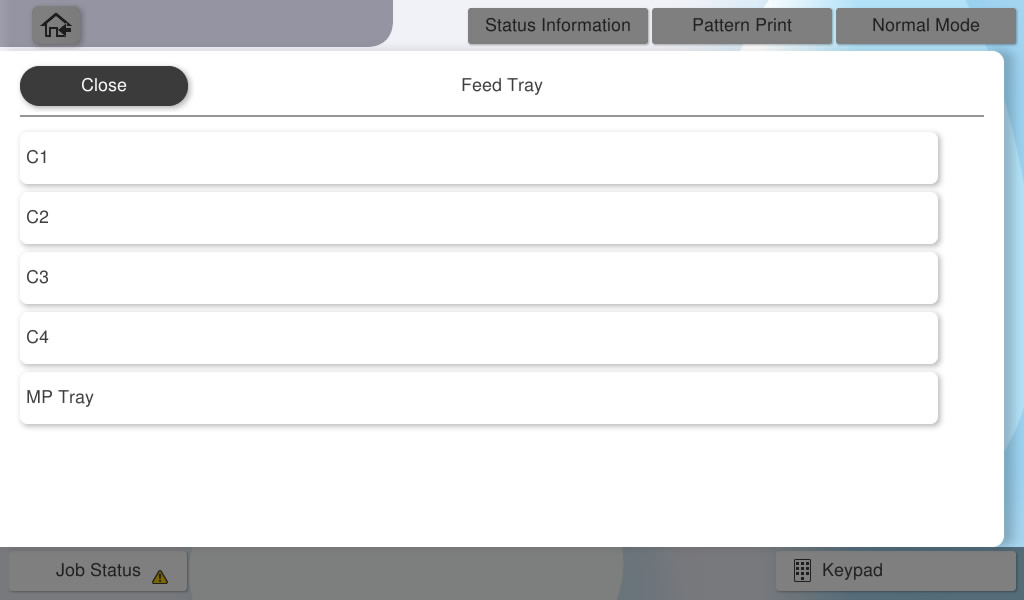
- Select [Paper Tray].
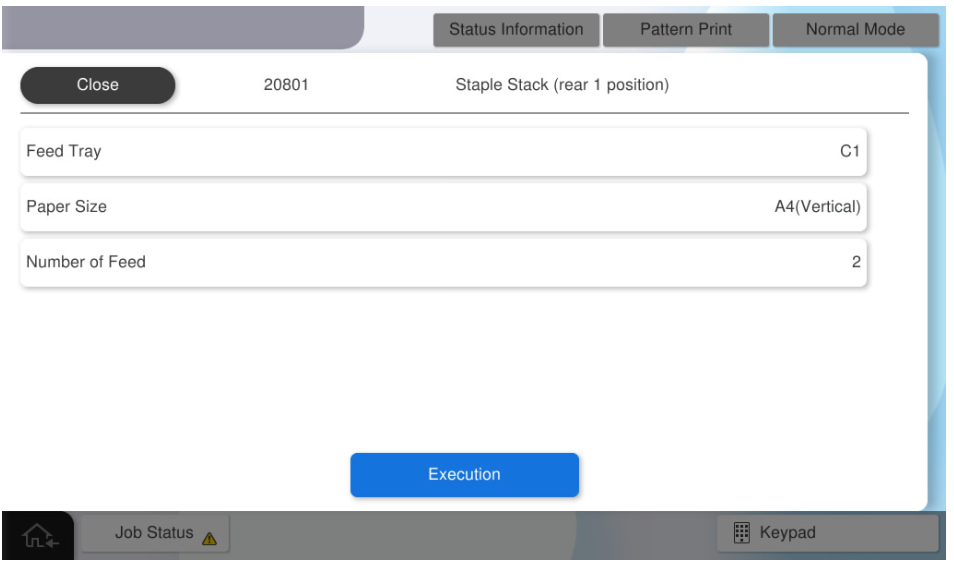
- Select the paper tray to use.
- Select [Paper Size].
- Select the paper size to use.

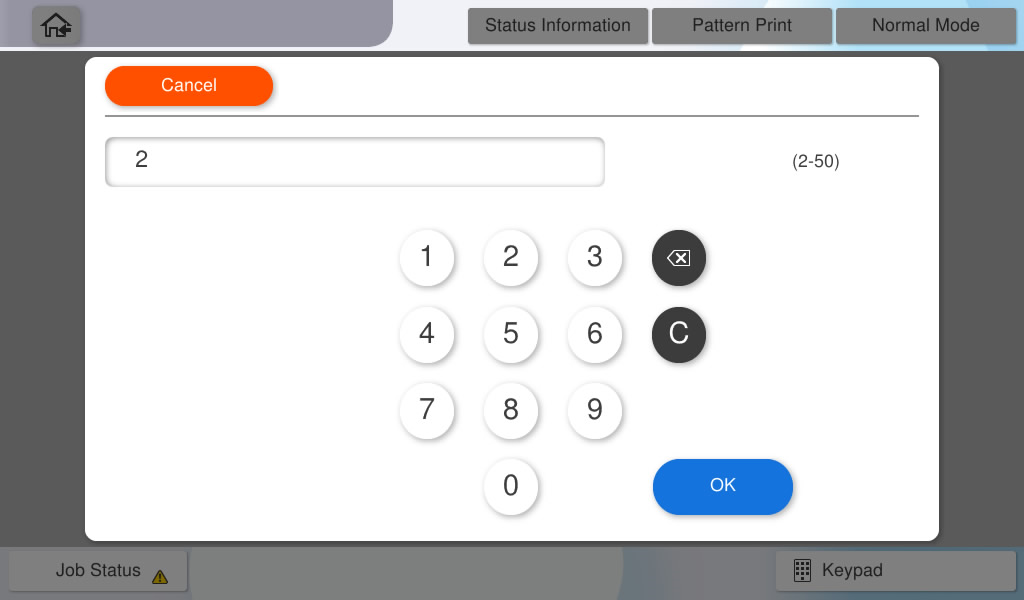
- Select [Number Sheets].
- Input the number of sheets to feed and press [OK] .
Press [Execute] and check the operation result.
 Note / 補足 Note / 補足 |
Follow the same procedure to confirm the following operations, and confirm that they work correctly.
|