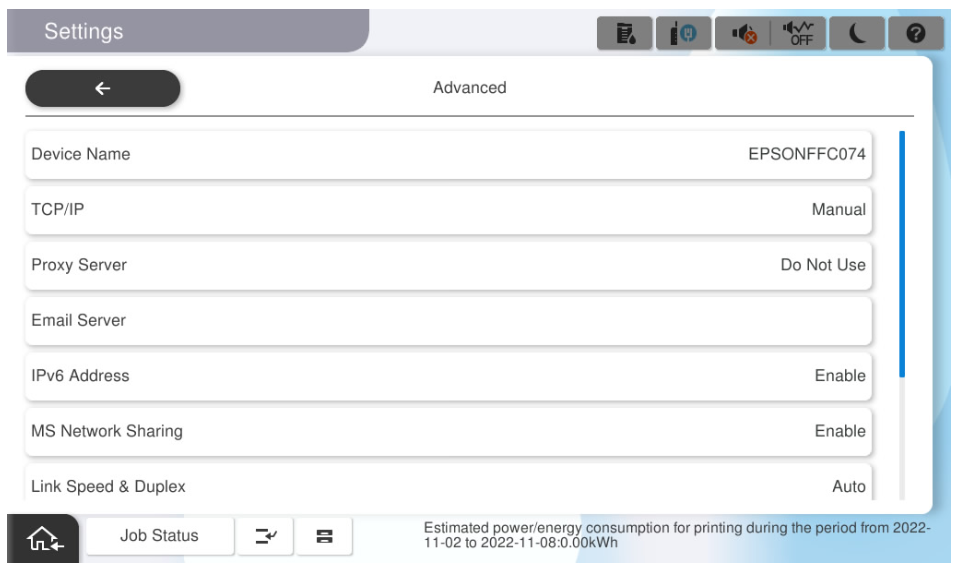
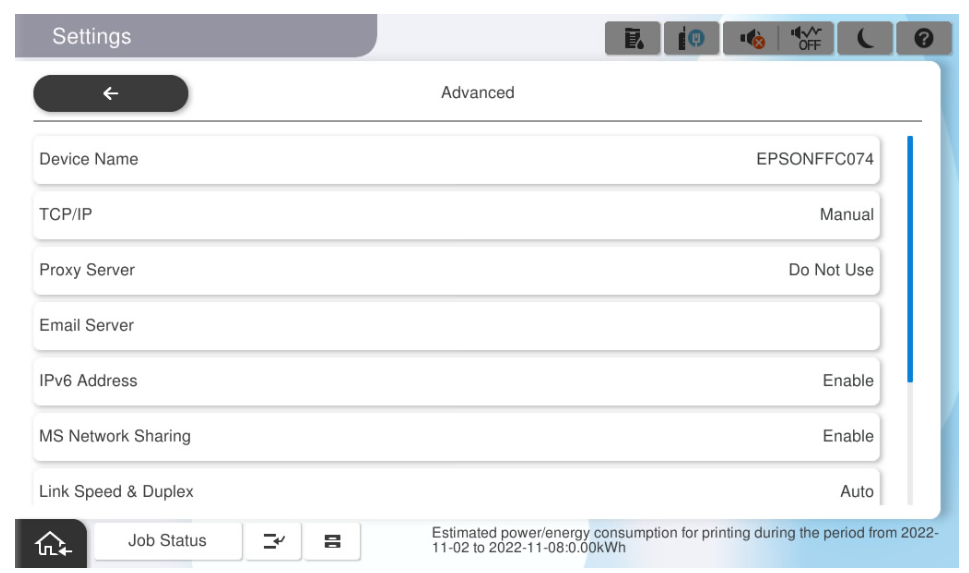
Standard Network Settings
Wired LAN Setting
- Connect the LAN cable.
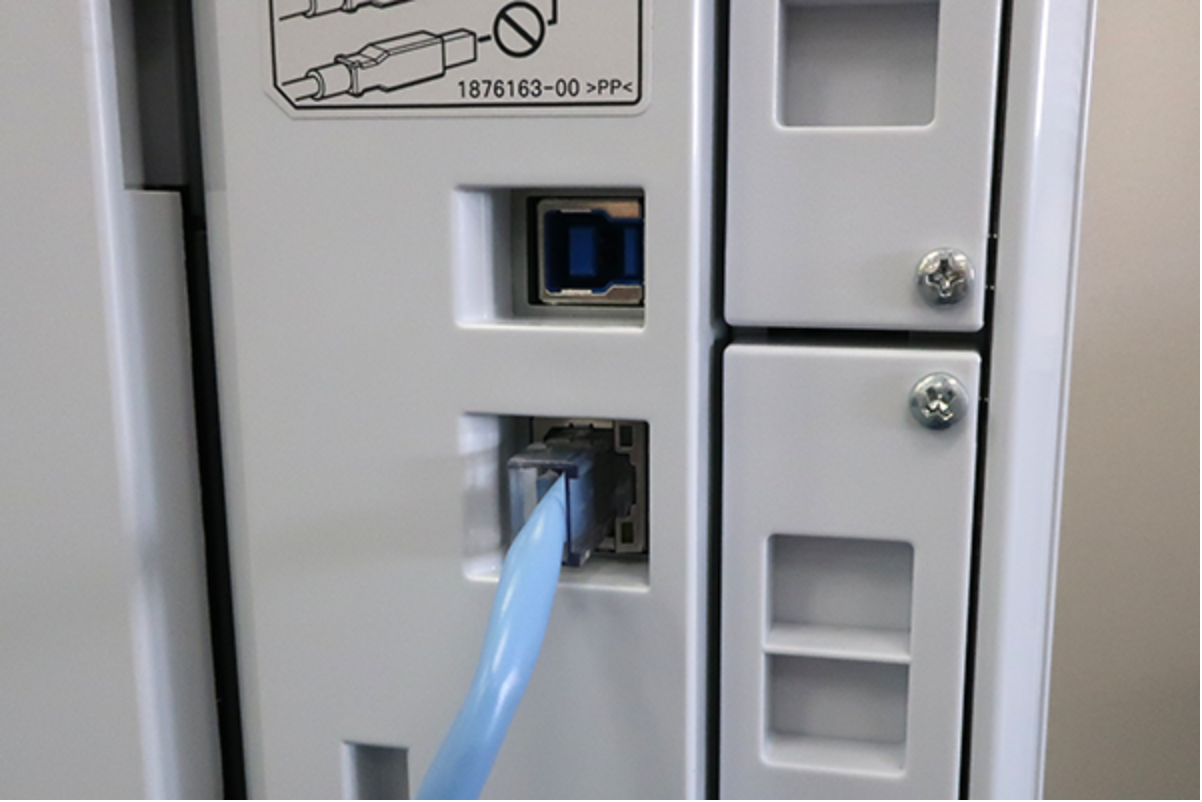
- Check that the network icon shows a wired LAN connection.
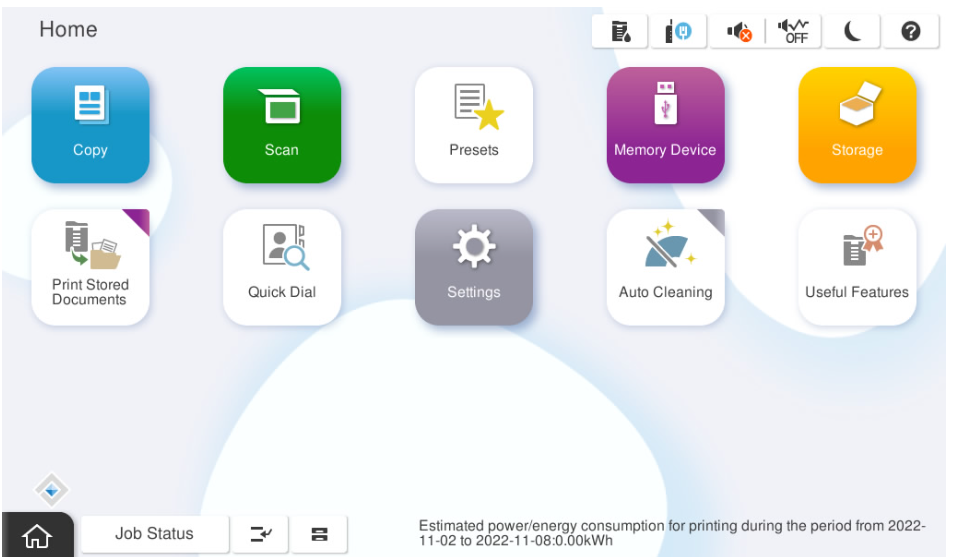
Static IP Address Setting
Static IP address Setting Procedure
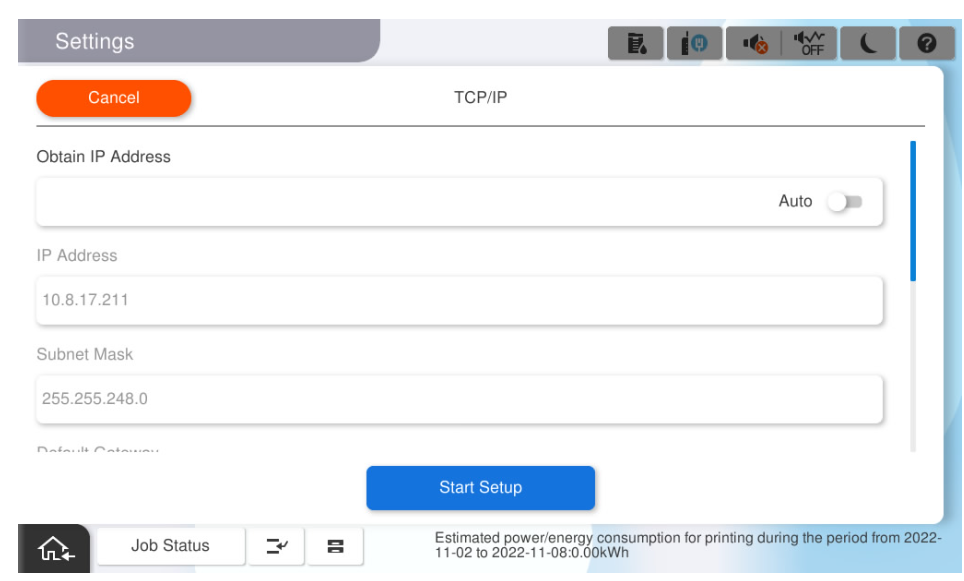
- Method to switch the network address settings.
- If the TCP/IP is set to [Auto], tap the this menu.

- Tap [Auto] of the Obtain IP Address.
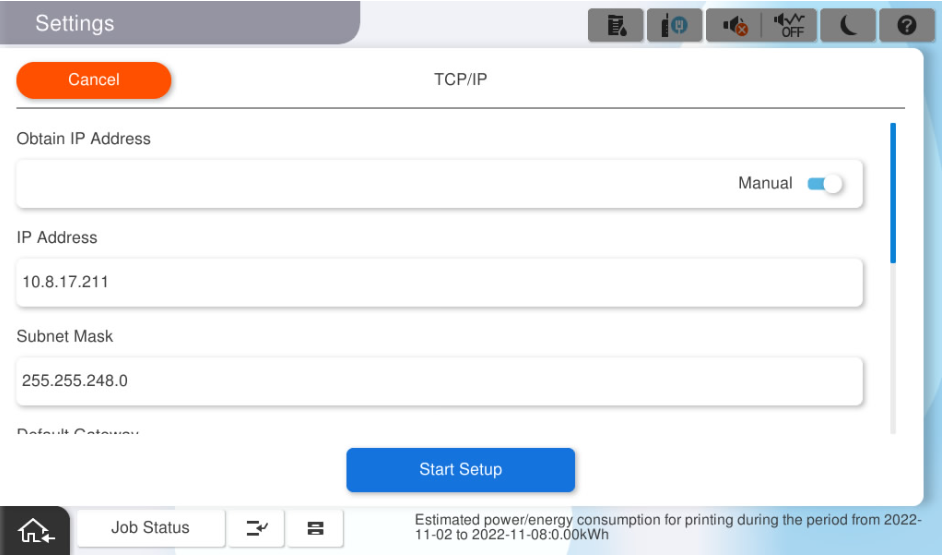
- Check that the method to Obtain IP Address is set to [Manual].
- If the TCP/IP is set to [Auto], tap the this menu.
- Set the IP Address.Tap [IP Address].
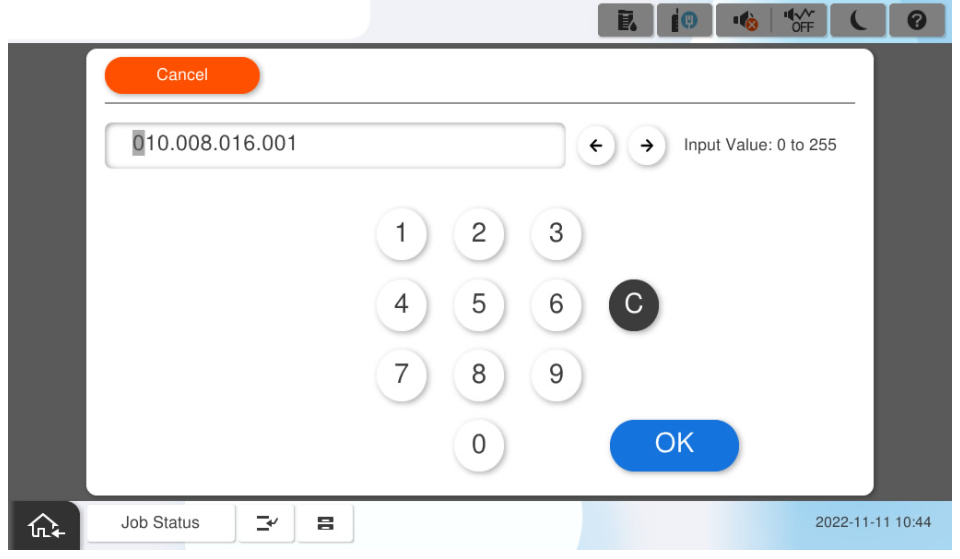
After starting the software keyboard, enter the IP address.
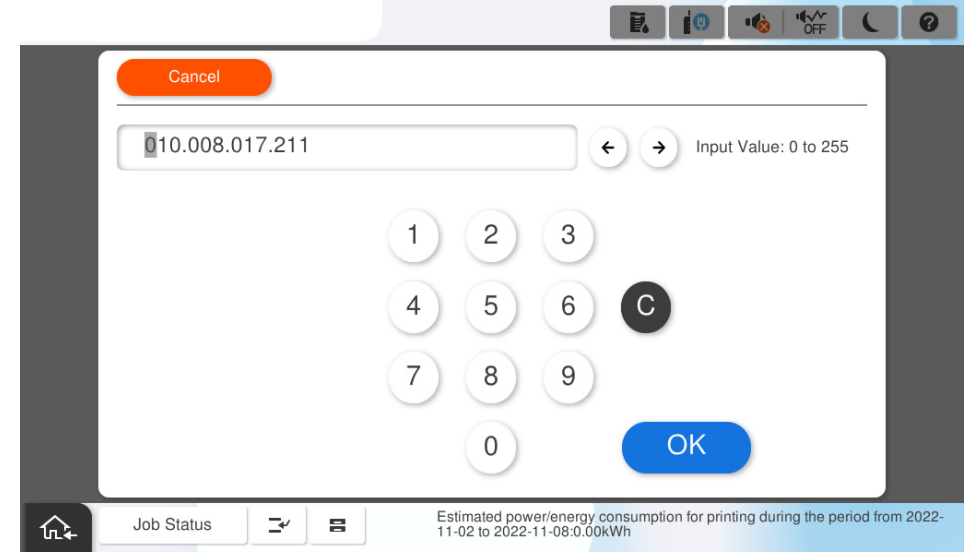
 Check Point / チェックポイント
When entering the IP address, make sure to enter 0 to match the number of digits. When returning from the software keyboard screen, the 0 entered to match the number of digits is (are) omitted on the display.
- When the IP address is “192.0.2.111”
192.000.002.111 - When the IP address is “192.0.12.10”
192.000.012.010
- When the IP address is “192.0.2.111”
- When the entry is completed, tap [OK].
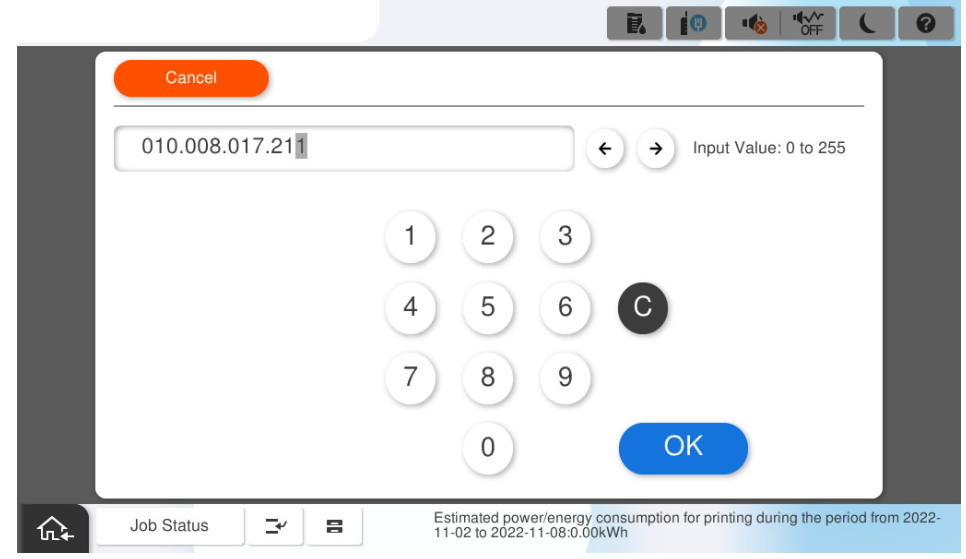
- Check that the entered IP Address is displayed on the screen.
- Subnet Mask Setting
- Tap [Subnet Mask].
- After starting the software keyboard,enter the subnet mask.
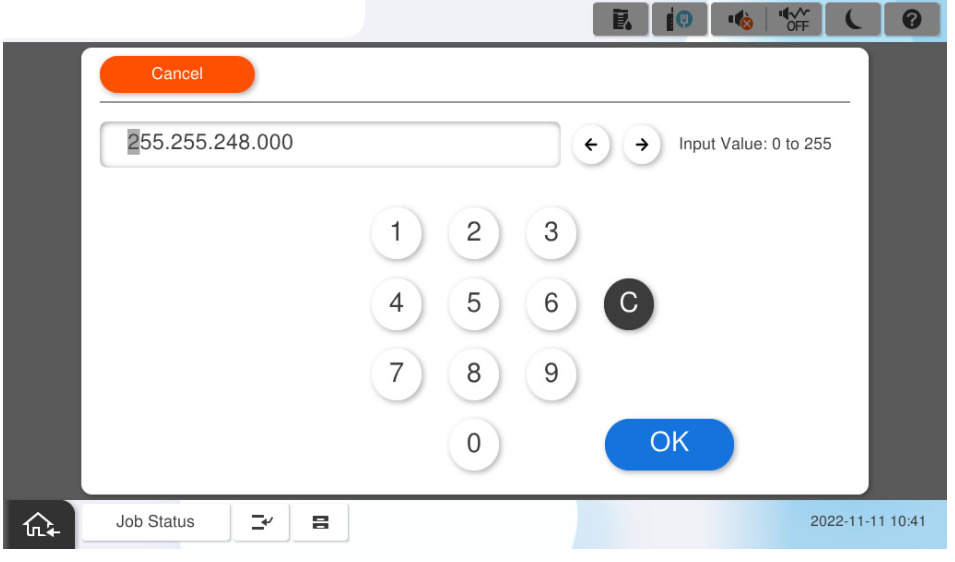
- When the entry is completed, tap [OK].
Check that the entered sub-net mask is displayed on the screen.
Check Point / チェックポイントWhen entering the sub-net mask address, enter 0 to match the number of digit. When returning from the software keyboard screen, the 0 entered to match the number of digits is (are) omitted on the display.
- When the IP address is “192.0.2.111”
192.000.002.111 - When the IP address is “192.0.12.10”
192.000.012.010
- When the IP address is “192.0.2.111”
- Tap [Subnet Mask].
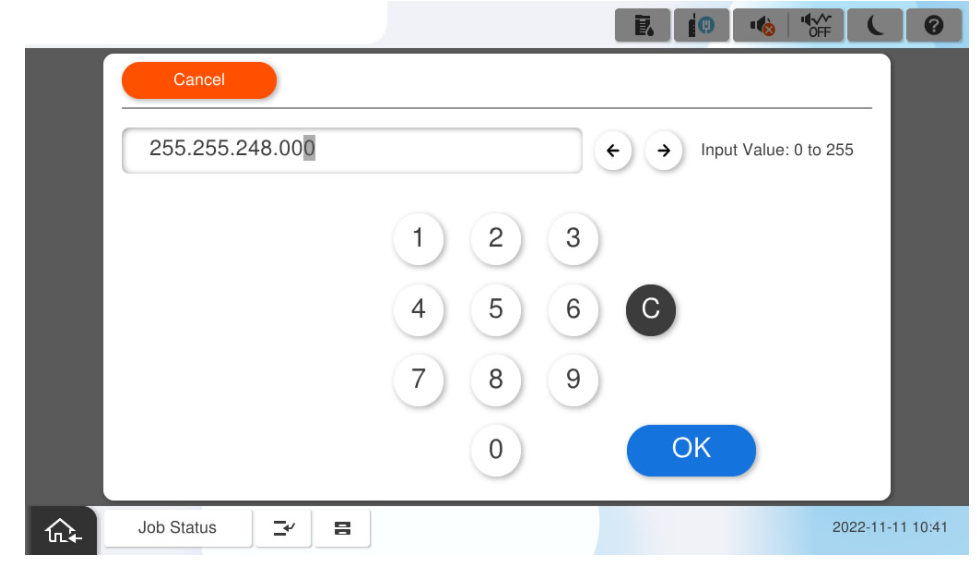
- Default Gateway Setting
- Tap [Default Gateway].
After starting the software keyboard,enter the default gateway address.
 Check Point / チェックポイント
When entering the Default Gateway, make sure to enter 0 to match the number of digits. When returning from the software keyboard screen, the 0 entered to match the number of digits is (are) omitted on the display.
- When the IP address is “192.0.2.111”
192.000.002.111 - When the IP address is “192.0.12.10”
192.000.012.010
- When the IP address is “192.0.2.111”
- When the entry is completed, tap [OK].

- Check that the entered Default Gateway is displayed on the screen.
- Tap [Default Gateway].
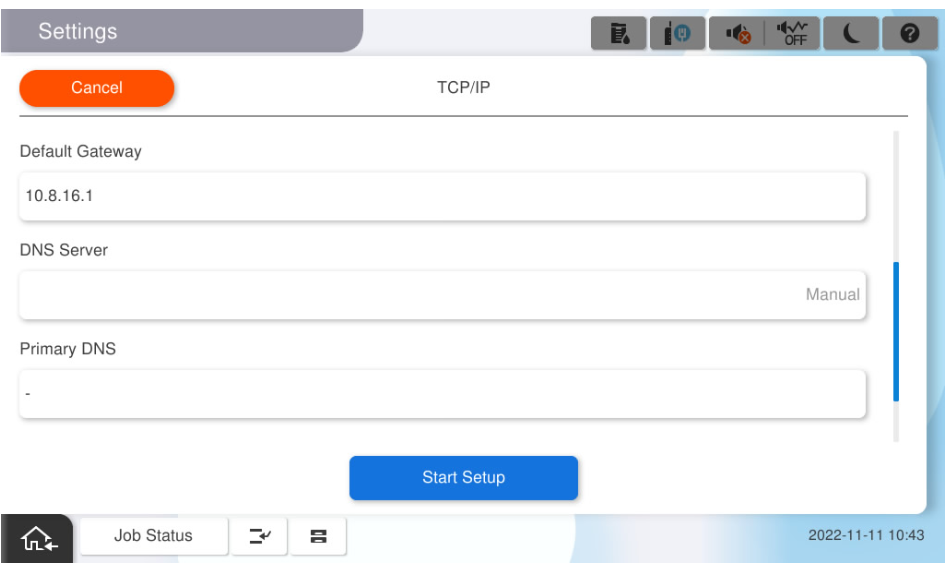
- Save the Settings
- Select [Start Setup].
- Wait for the settings to take effect.
- Confirm that the setting completion screen is displayed.
- Select [Start Setup].
DNS Server Setting Procedure
- Method to switch the DNS server settings.
- If the DNS server setting is [Auto], tap [Auto].
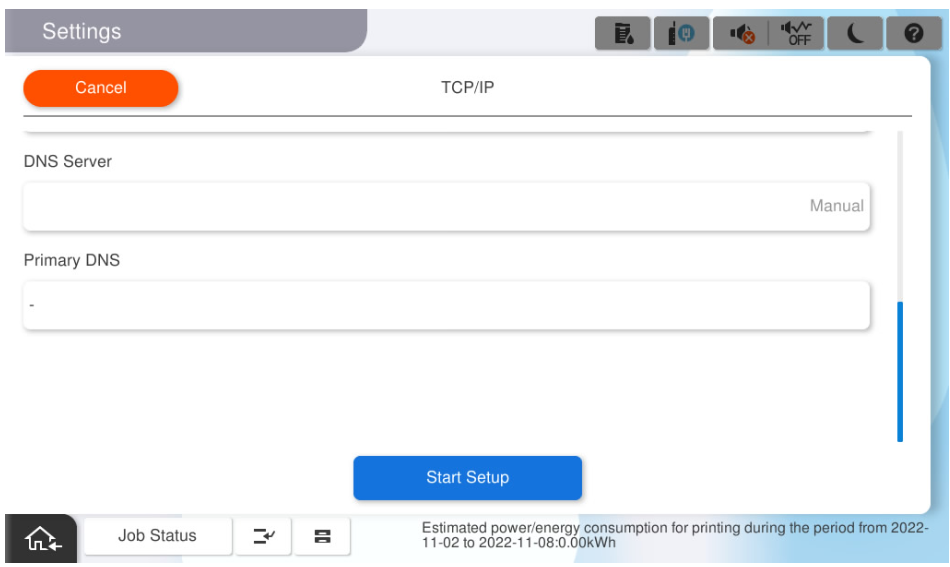
Check that the DNS server setting is set to [Manual].
Check Point / チェックポイントWhen entering the IP address of the primary DNS, make sure to enter 0 to match the number of digits. When returning from the software keyboard screen, the 0 entered to match the digits are omitted on the display.
- When the IP address is “192.0.2.111”
192.000.002.111 - When the IP address is “192.0.12.10”
192.000.012.010
- When the IP address is “192.0.2.111”
- If the DNS server setting is [Auto], tap [Auto].
- Primary DNS settings
- Tap [IP address] of the primary DNS.
When the software keyboard starts up, enter the primary DNS IP address based on the hearing sheet.
 Check Point / チェックポイント
When entering the IP address of the primary DNS, make sure to enter 0 to match the number of digits. When returning from the software keyboard screen, the 0 entered to match the digits are omitted on the display.
- When the IP address is “192.0.2.111”
192.000.002.111 - When the IP address is “192.0.12.10”
192.000.012.010
- When the IP address is “192.0.2.111”
- When the entry is completed, select [OK].
- Tap [IP address] of the primary DNS.
- Save the settings.
- Select [Start Setup].
- Wait for the settings to take effect.
- Confirm that the setting completion screen is displayed.
- Select [Start Setup].
Dynamic IP Address Setting
- Method to switch the Network Address settings.
- Set [TCP/IP] to [Auto].
- If it is set to [Manual], switch to [Auto].

- Set [TCP/IP] to [Auto].
- Save the settings.
- Tap on [Start Setup].
- Wait for the settings to take effect.
- Confirm that the setting completion screen is displayed.
- Tap on [Start Setup].
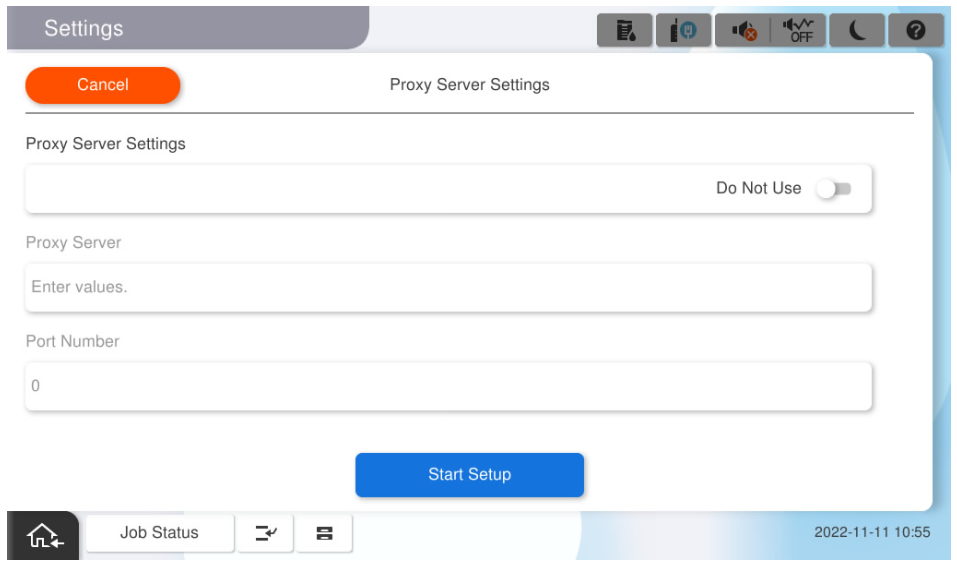
Proxy Server Setting
- Method to switch the Proxy Server settings.
- Tap [Do Not Use a Proxy].
- Confirm that the proxy server setting screen is displayed.
- Tap [Do Not Use a Proxy].
- Proxy server usage settings.
- Tap [Do Not Use] in the proxy server settings.
- Confirm that the proxy server use setting is set to [Use].
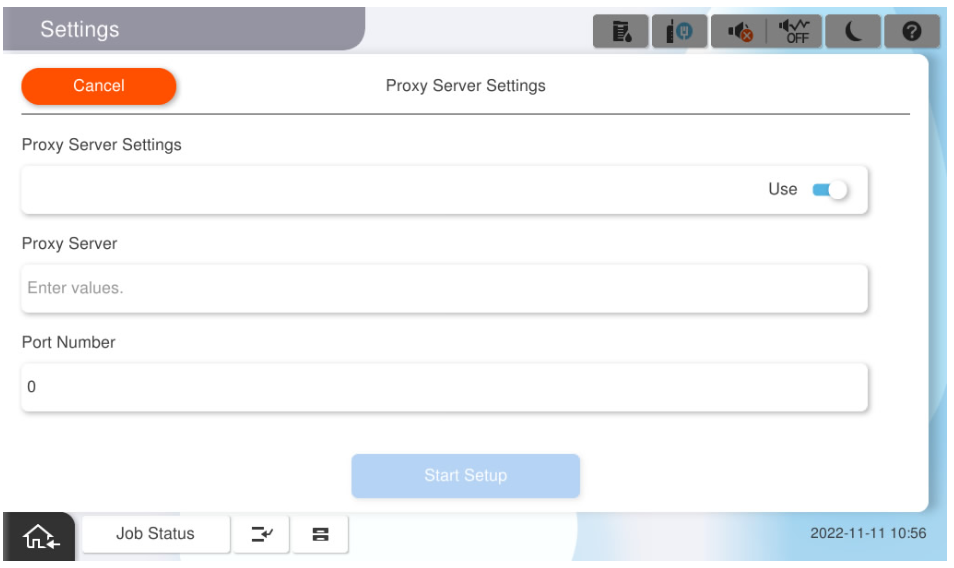
- Tap [Do Not Use] in the proxy server settings.
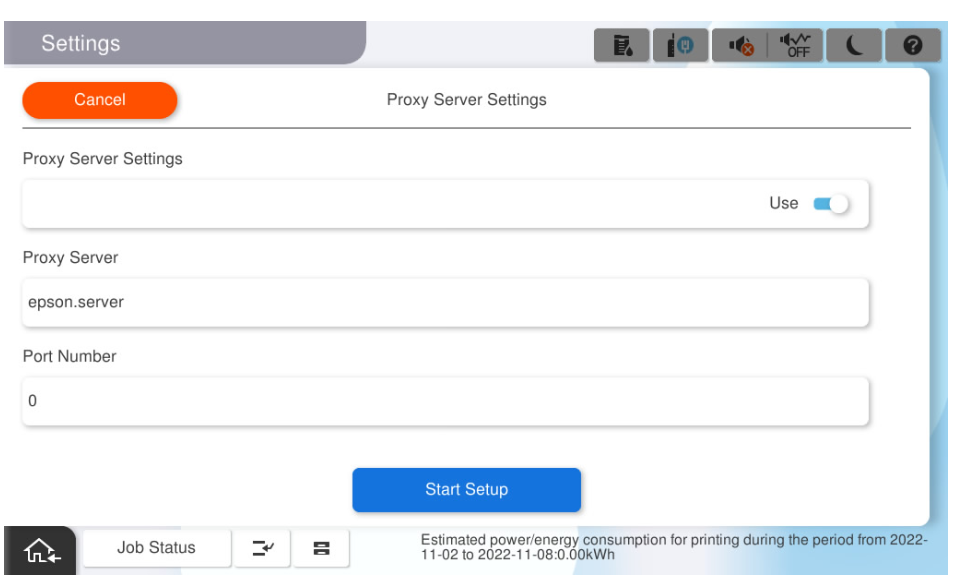
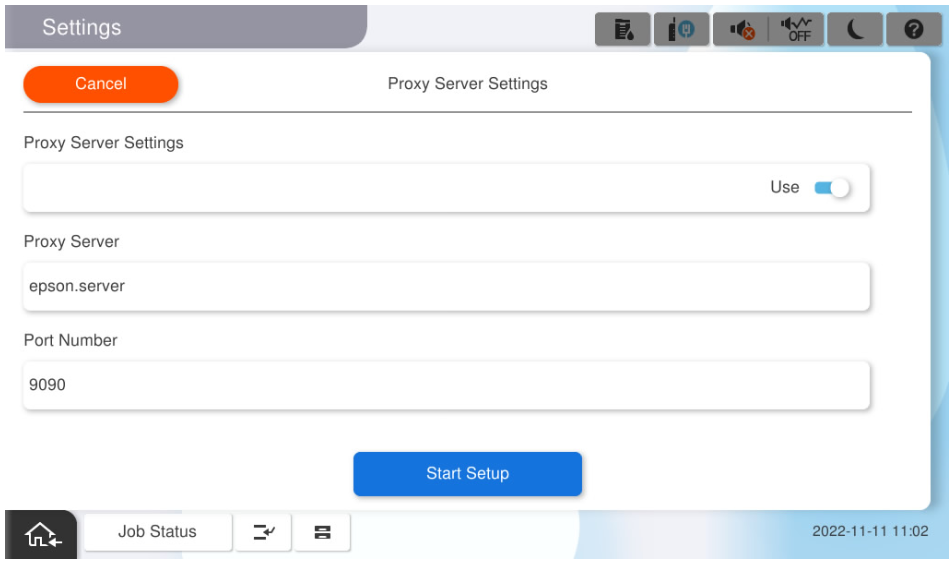
- Proxy Server Settings.
- Tap [Enter Values] for Proxy Server.
- Confirm the input screen appears, and enter the URL or IP address based on the customer hearing sheet.
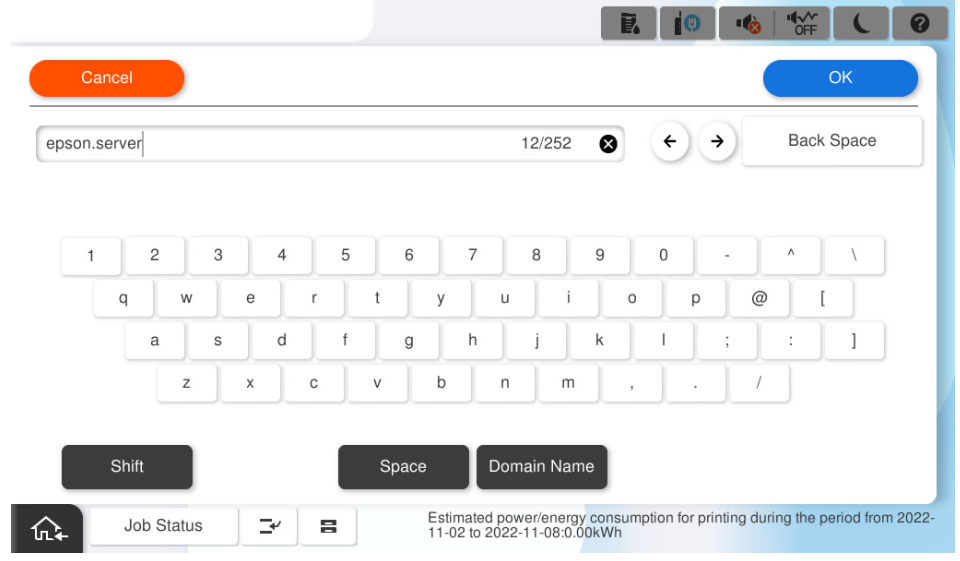
- Press [OK].
- Confirm the proxy server setting has been changed.
- Tap [Enter Values] for Proxy Server.
- Set the proxy server port number.
- Tap the [Port Number].
- When the input screen shows up, enter the port number based on the customer hearing sheet.

- Tap [OK].
- Confirm the port number setting has been changed.
- Tap the [Port Number].
- Save settings
- Select [Start Setup].
- Wait for the settings to take effect.
- Confirm that the setting completion screen is displayed.
- Select [Start Setup].