OCR Option Installation Procedure
Bundled Items
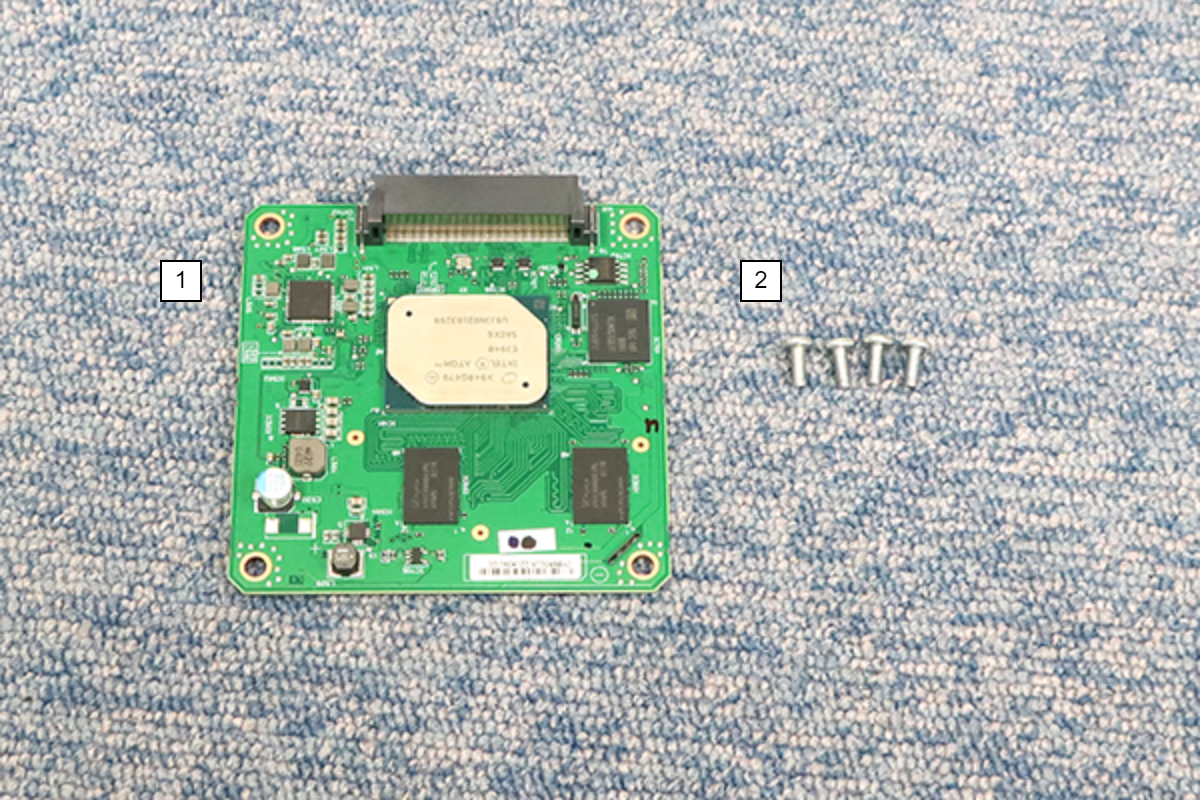
| No. | Bundled Items | Qty. |
|---|---|---|
| 1 | OCR Board | 1 |
| 2 | Screw M3 × 8 | 4 |
Installation Procedure
Items to Prepare
- Gloves
- Cutter
- Phillips (+) screwdriver
Minimum number of workers
1 person
 Caution / 注意 Caution / 注意 |
|
Installation Procedure
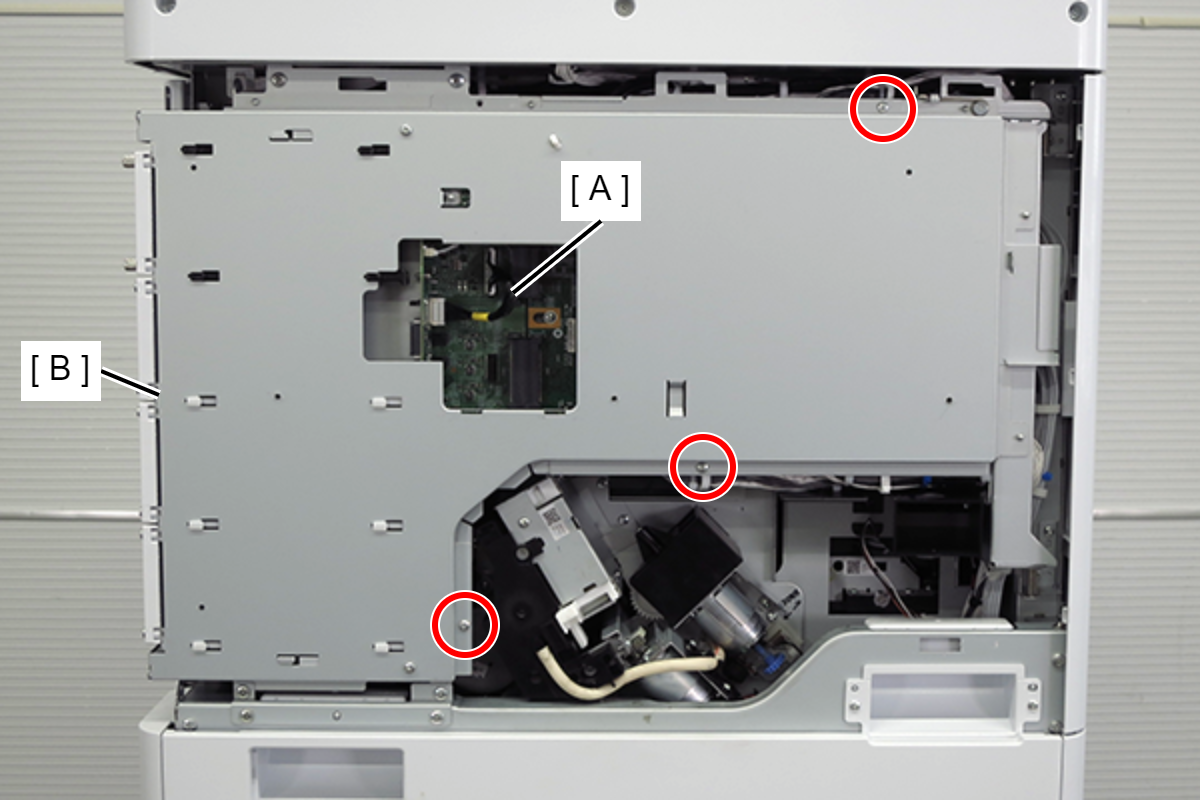
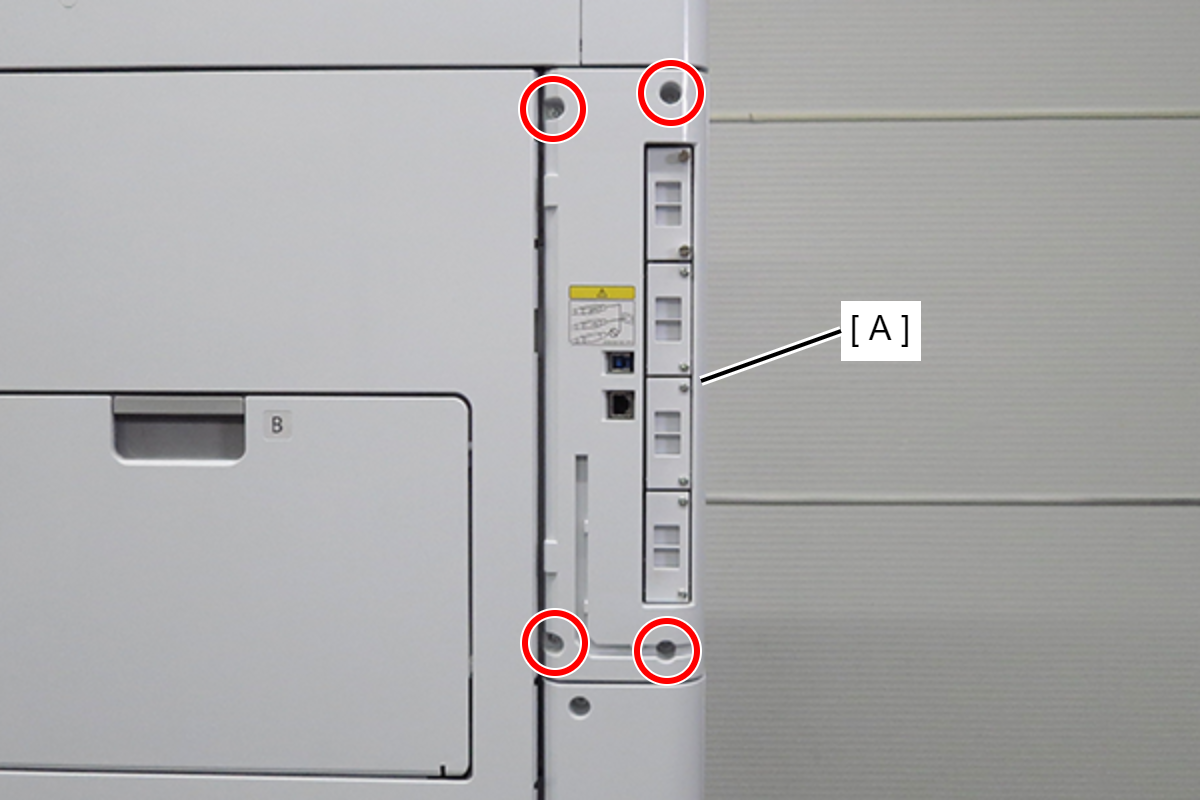
- Remove the 4 screws and remove the right cover sub (A).

 : 3x10DC/P
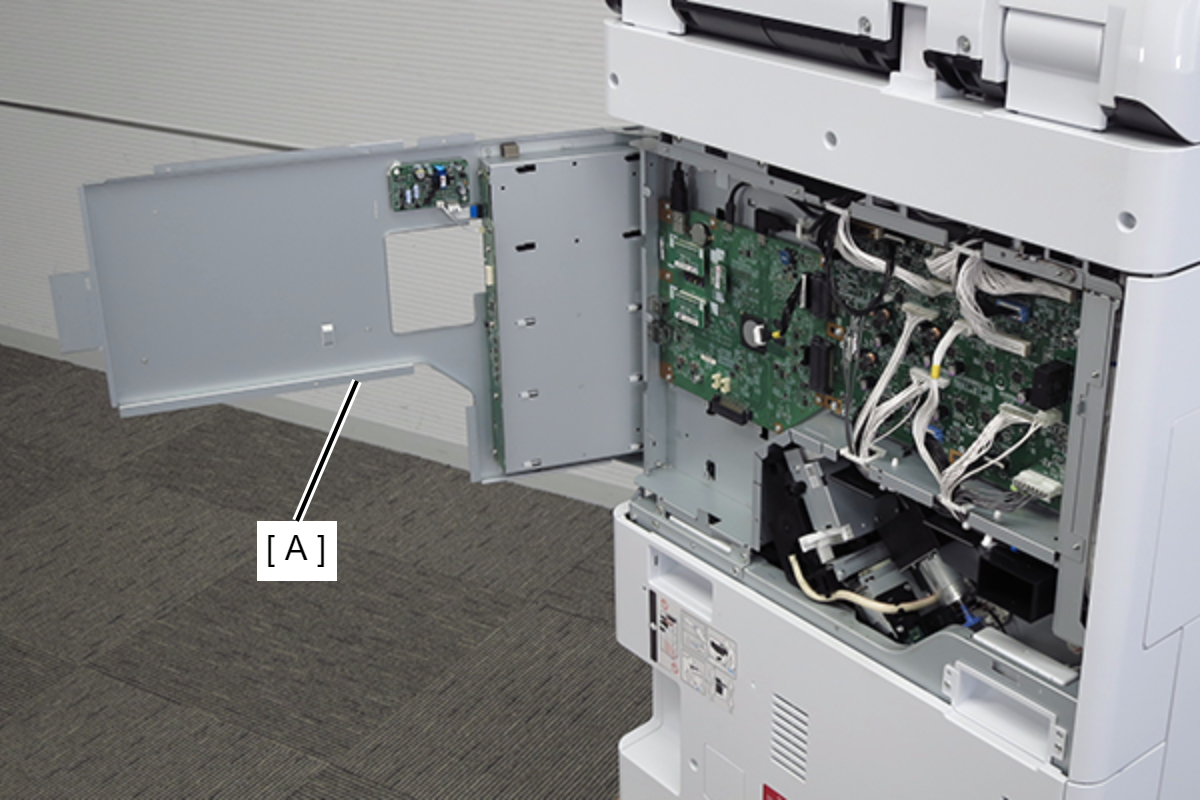
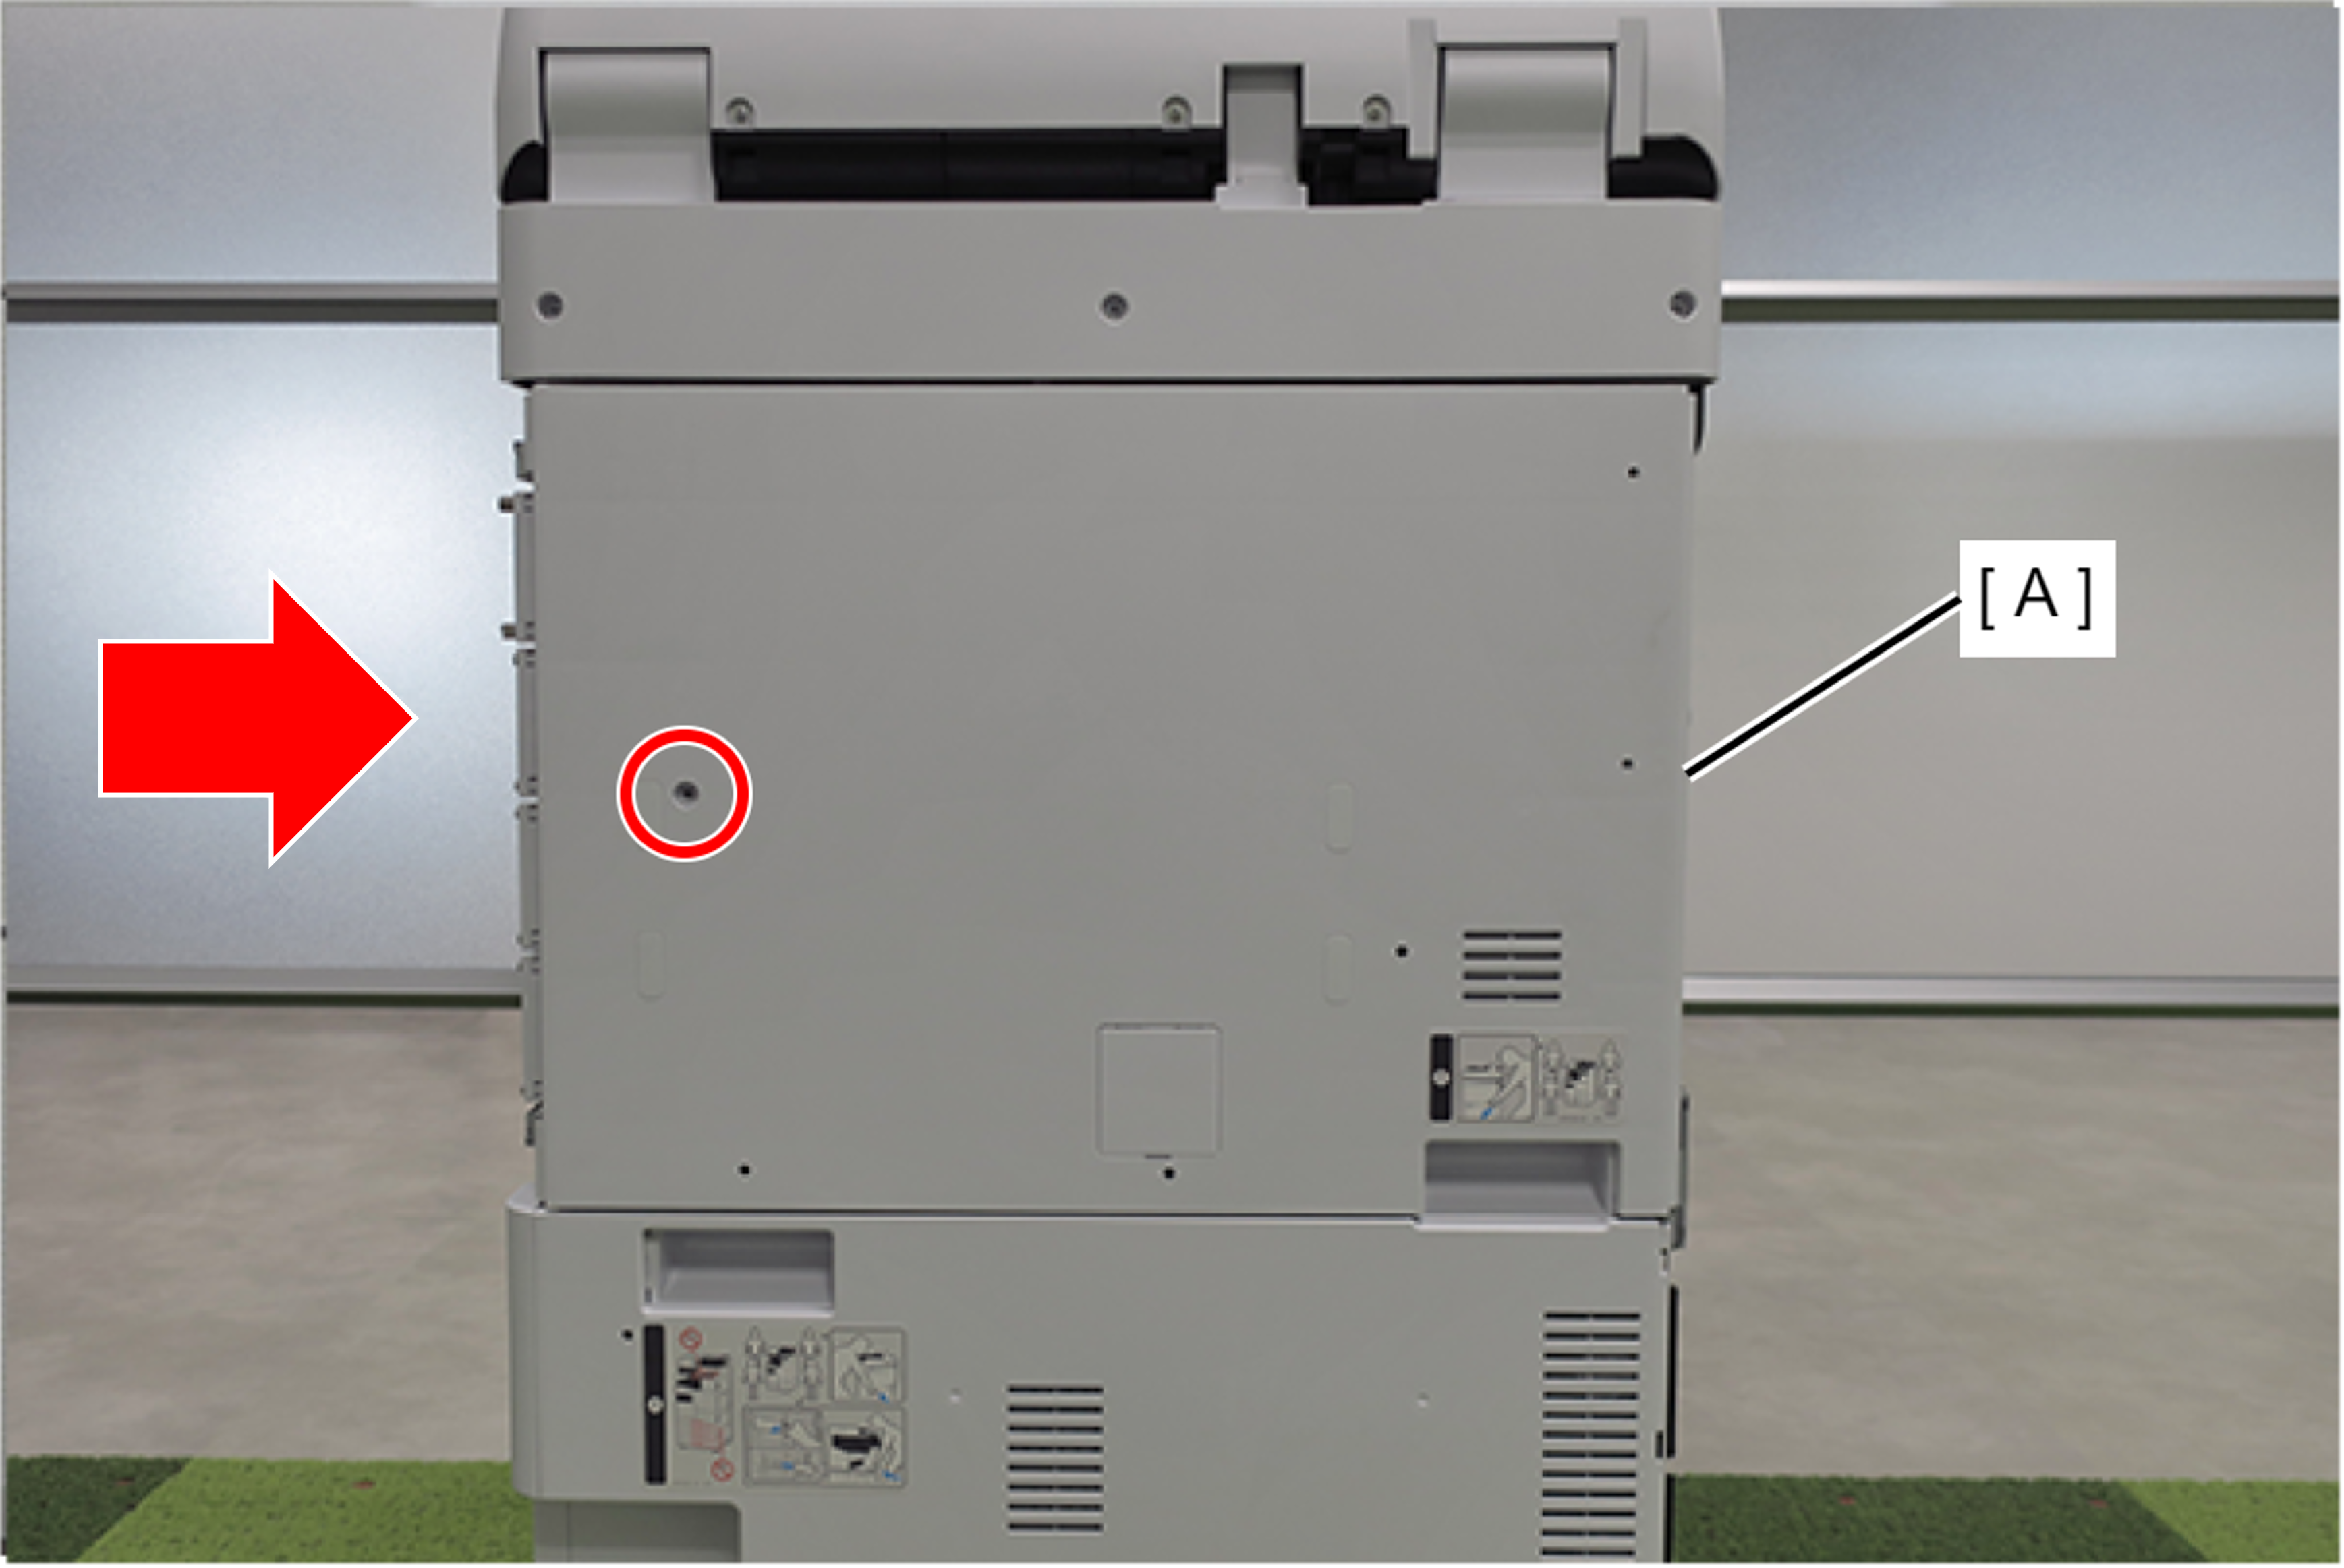
- Remove the 1 screw and slide the rear cover (A) in the direction of the arrow to remove it.
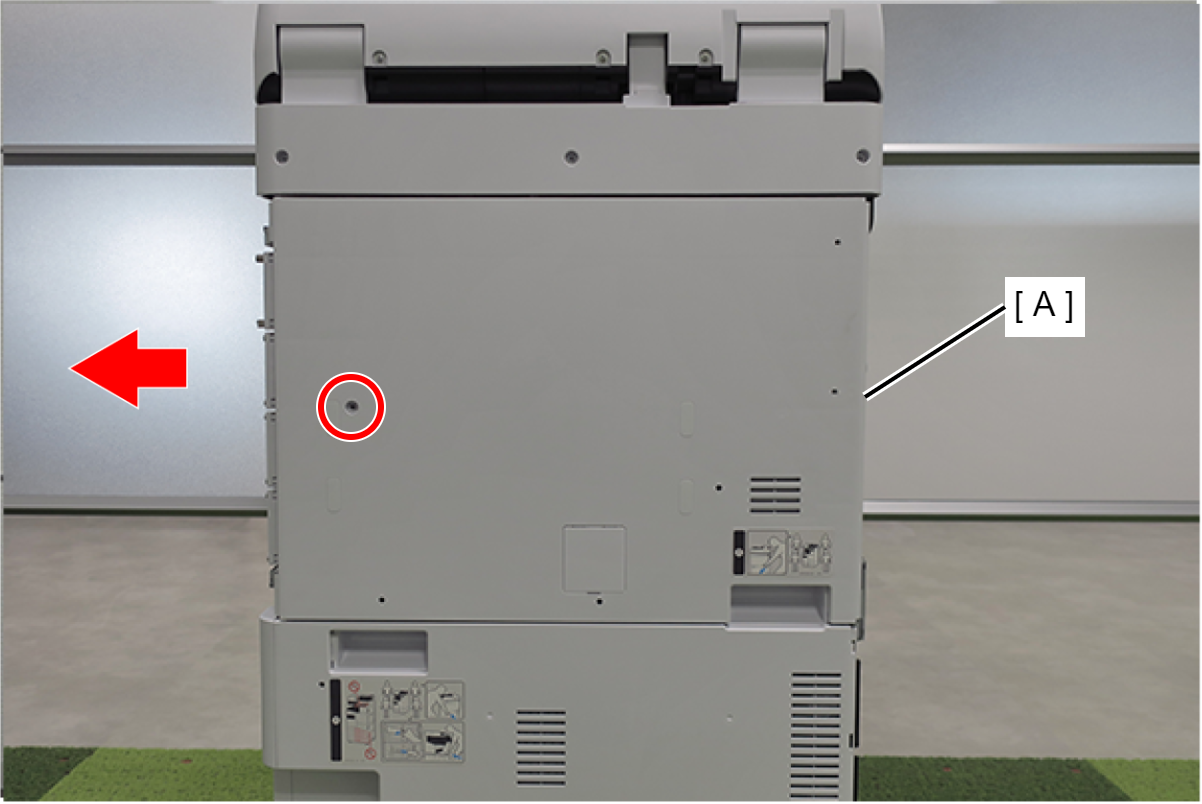
- : 3x10DC/P
- Remove the screw.
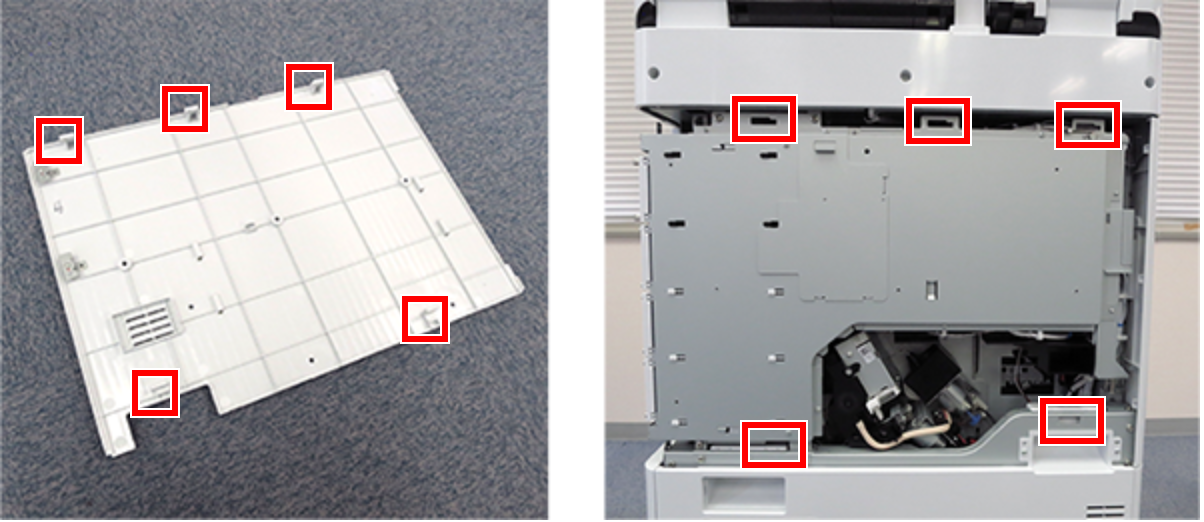
- Remove the shield plate (A) upwards.
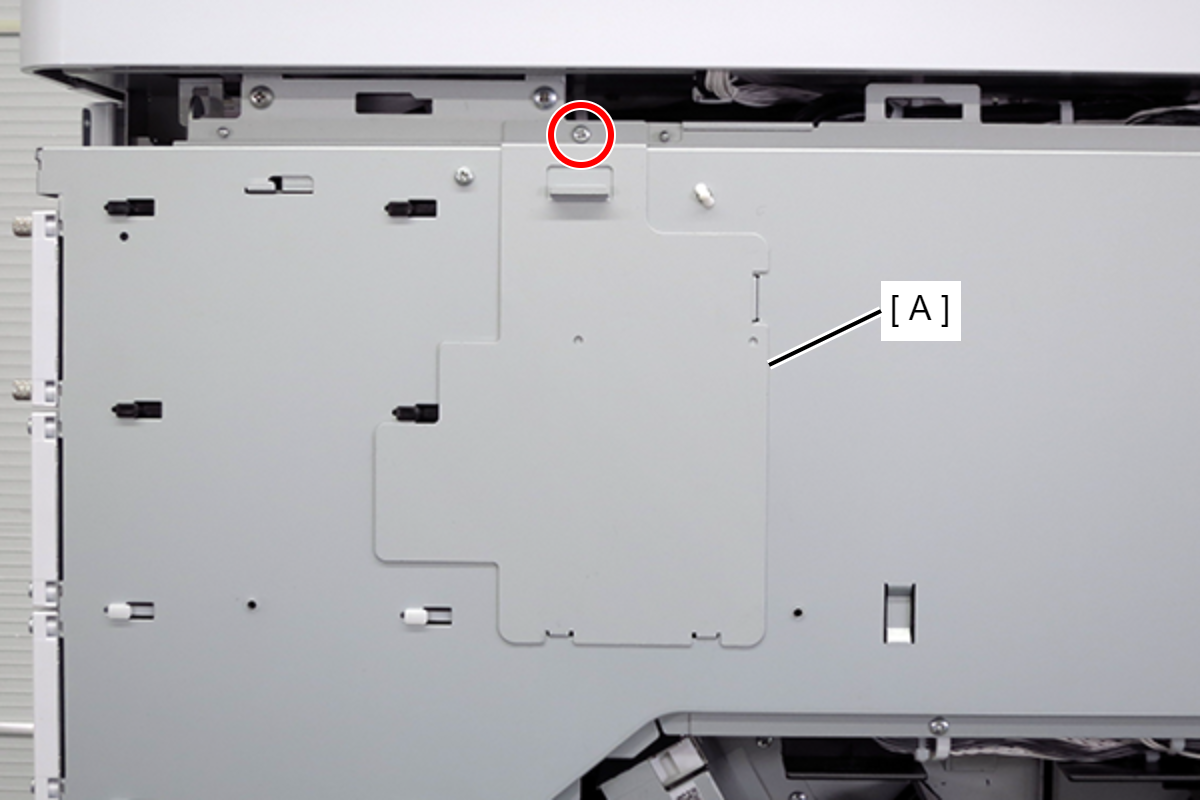
- : 3x8D/P
- Remove the cable (A) from the connector.
- Remove 3 screws.

- : 3x8D/P
- Lift the handle to release the hook.
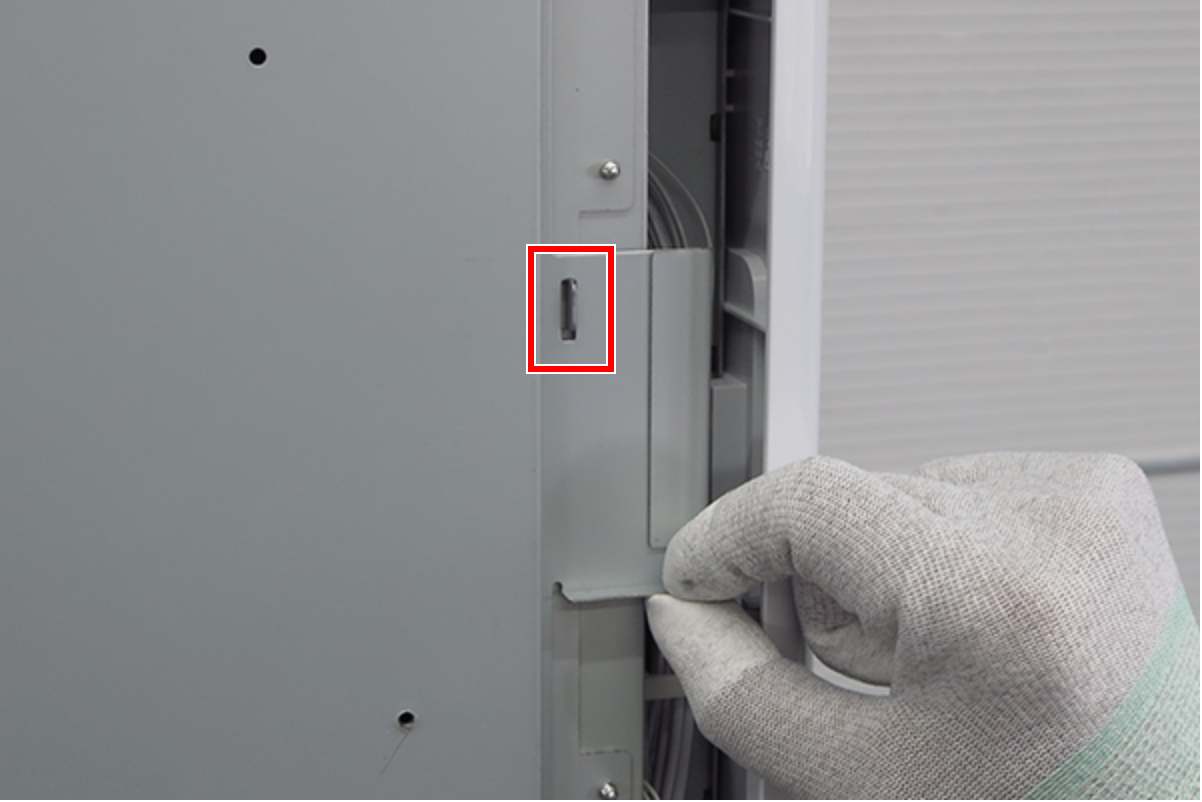
- Open the board box upper case (A).
- Connect the OCR board (A) to the connector (B) on the main board and secure it with four screws.
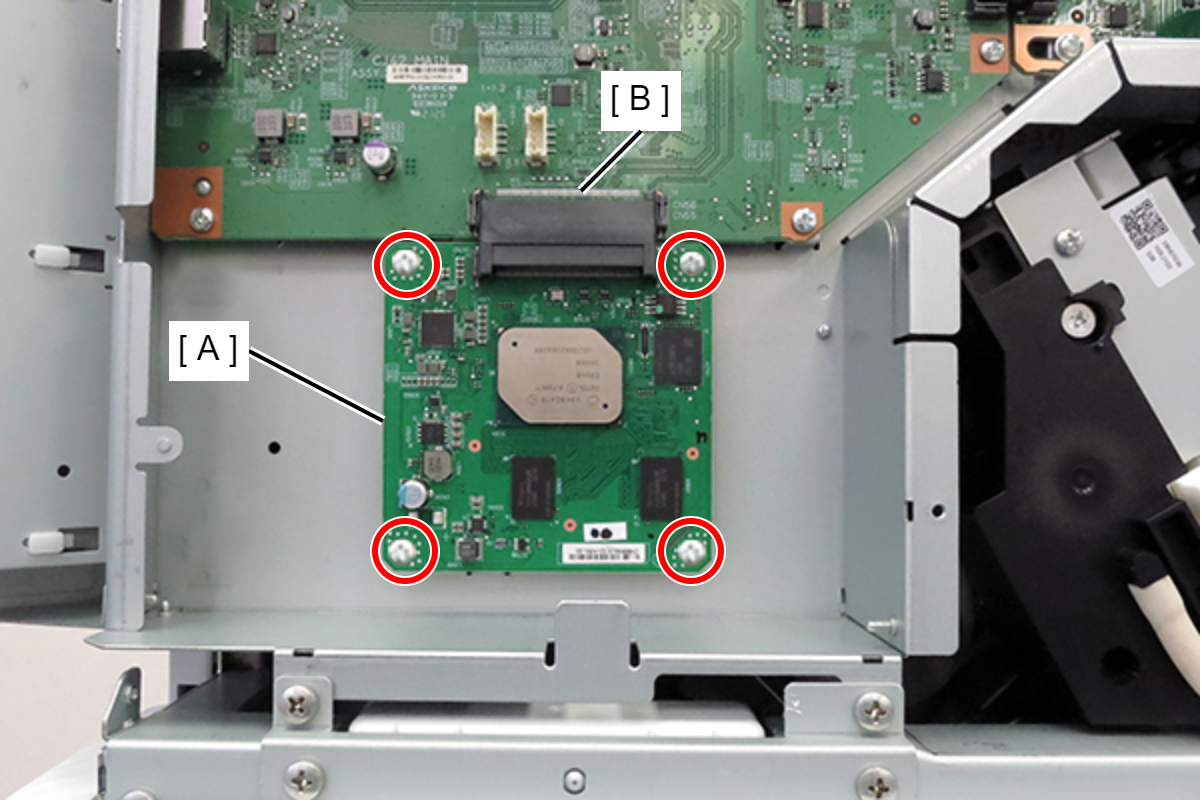
- : 3x8D/P
- Close the circuit board box upper case (A), lift the handle and lock it with the hook.
- Connect the cable (A) to the connector.
- Secure the board box upper case (B) with three screws.
- : 3x8D/P
- Hook the 2 hooks (A) of the shield plate to the 2 holes (B) of the circuit board box and attach the shield plate (C).

- Secure the shield plate (A) with one screw.

- : 3x8D/P
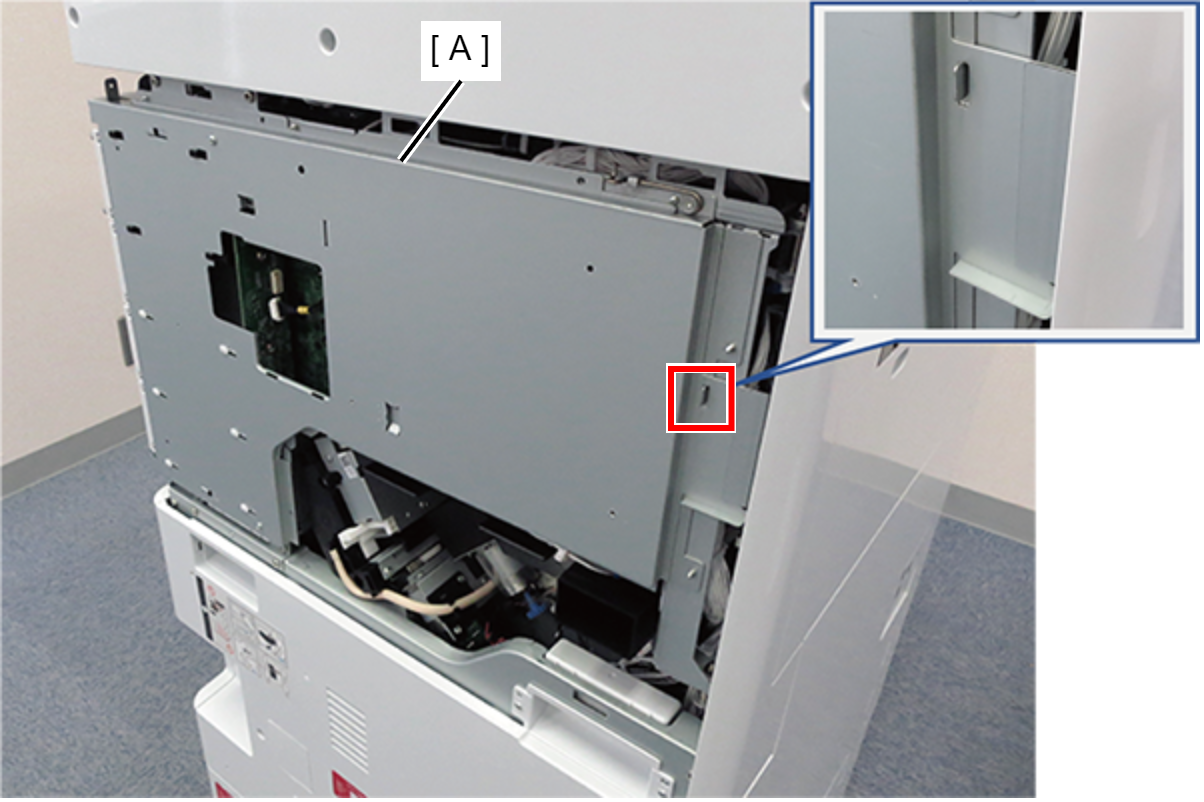
- Align the 5 hooks on the rear cover with the 5 holes on the main unit and attach it.
- Slide the rear cover (A) in the opposite direction of the arrow to hook it, and secure it with one screw.
- : 3x10DC/P
- Install the right cover sub (A) and secure it with 4 screws.
- : 3x10DC/P
 Check Point / チェックポイント Check Point / チェックポイント |
After installing OCR, please activate it. |